Staking on Starknet: How to Bridge + Stake Your STRK (Ethereum to Starknet)

This article will provide you with a simple, step-by-step guide, on how to bridge your STRK tokens from Ethereum and stake them on Starknet.
Starknet is the first Layer 2 ZK-Rollup on Ethereum to enable direct to validator staking. STRK holders can stake from 26 Nov, the launch date for Starknet staking to go live on miannet.
To be able to stake STRK tokens with a validator, users must first bridge their STRK from Ethereum mainnet to Starknet L2. Bridge and stake your STRK in just a few clicks via the Starknet Stake App on stakingrewards.com.
Follow the steps below to get started.
Step 1: Go to Stake App
To begin, navigate to the Stake app on stakingrewards.com.
Select “STRK” as the asset and then click the “Ethereum” tab along the top.
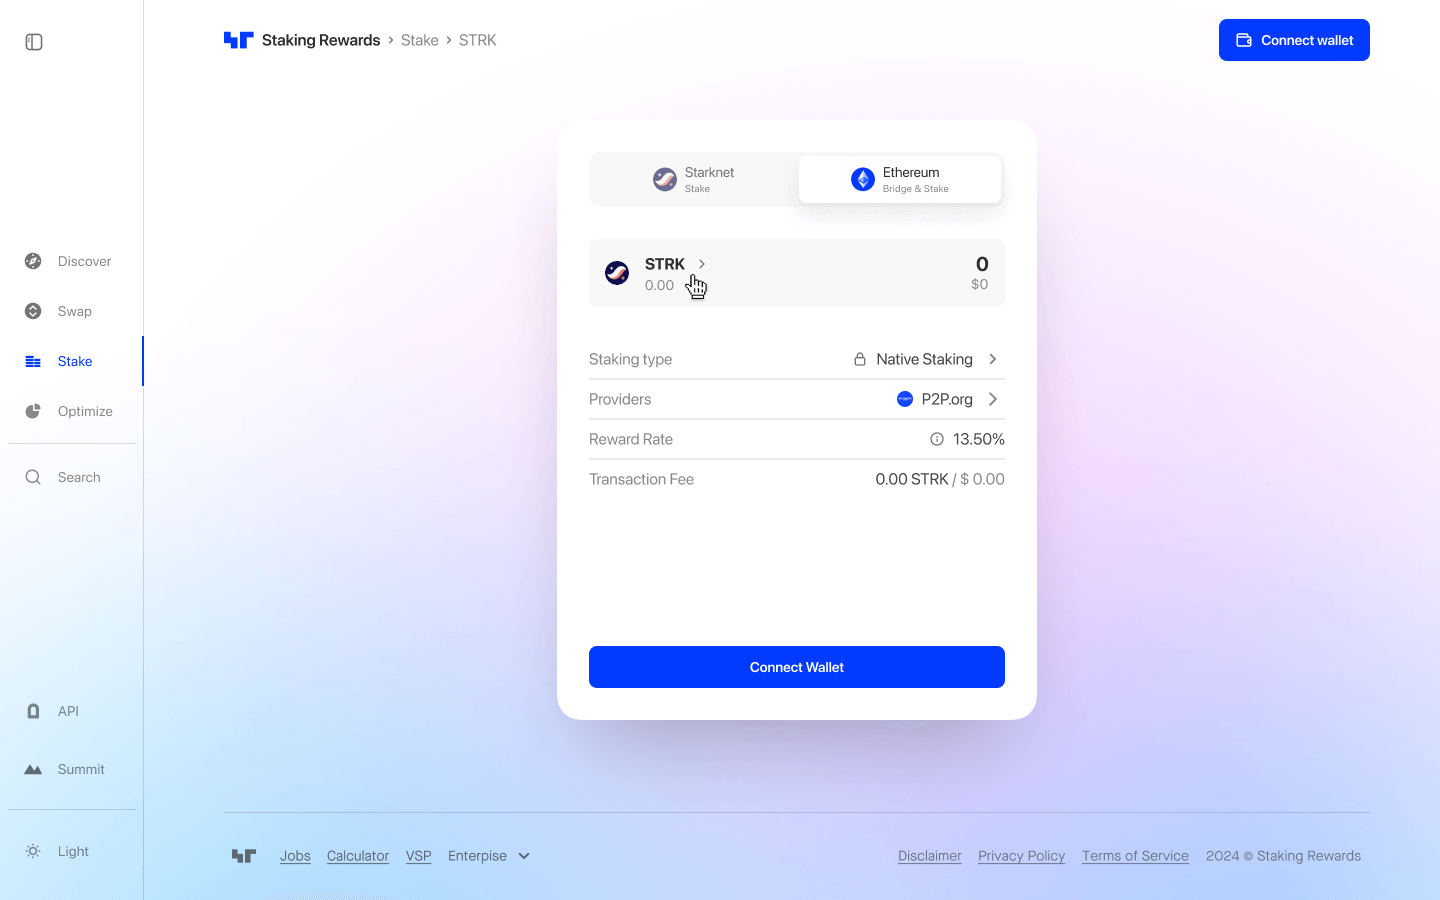
Step 2: Connect your wallets
Click the "Connect wallet" button.
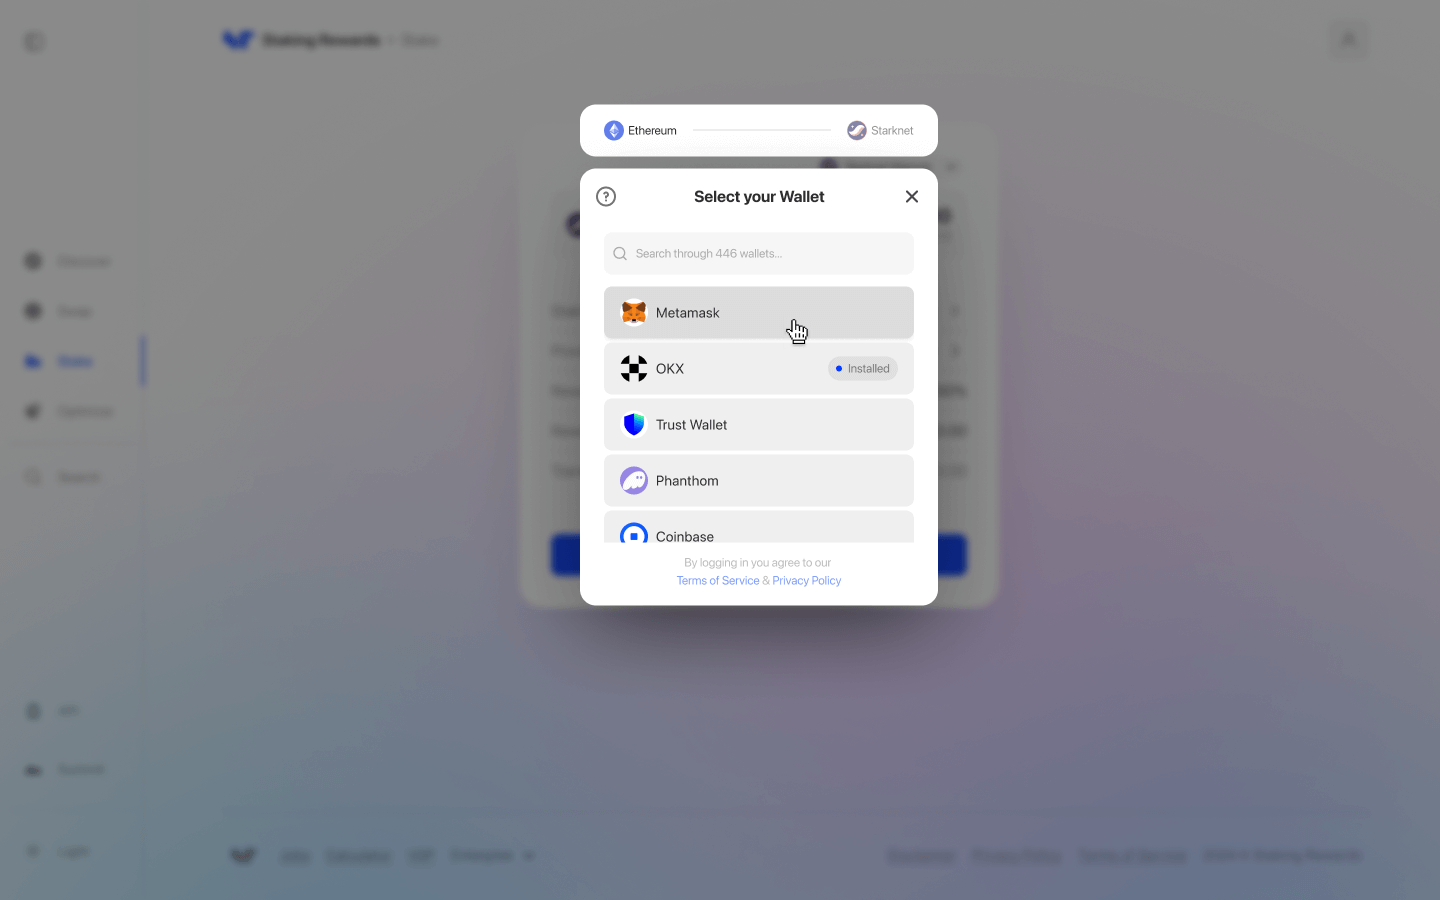
You will get prompted to connect both your Ethereum and Starknet wallets to complete the Bridge + Stake process. Click the "Get started" button to proceed.

Firstly, connect your Ethereum wallet (e.g. MetaMask, Rabby).
Important: Ledger signing is supported for all Browser extension wallets, however Ledger Live is not supported in this release.
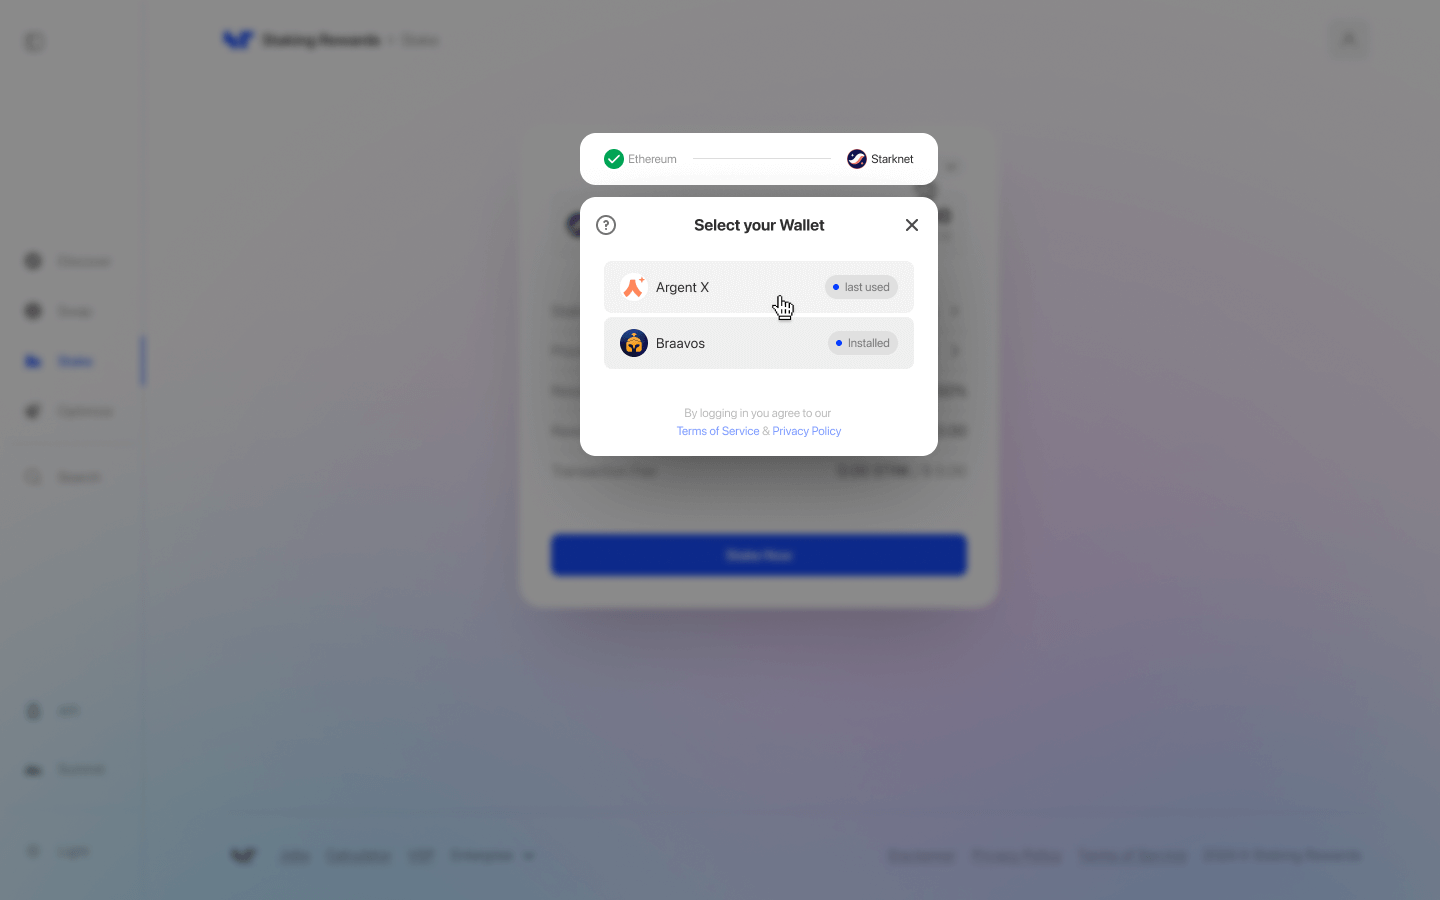
Next, select your Starknet wallet (e.g., Argent X or Braavos)
If you don't have a Starknet wallet yet. You can download Braavos or Argent and set up an account. You’ll have to create a password and save your seed phrase (a string of 12-24 random words, depending on the wallet you choose) for if you ever need to recover your account. You’re also welcome to enhance your wallet security with two-factor authentication (2FA).
Step 2: Bridge your STRK from Ethereum to Starknet L2
Next, enter the amount of STRK you would like to bridge.
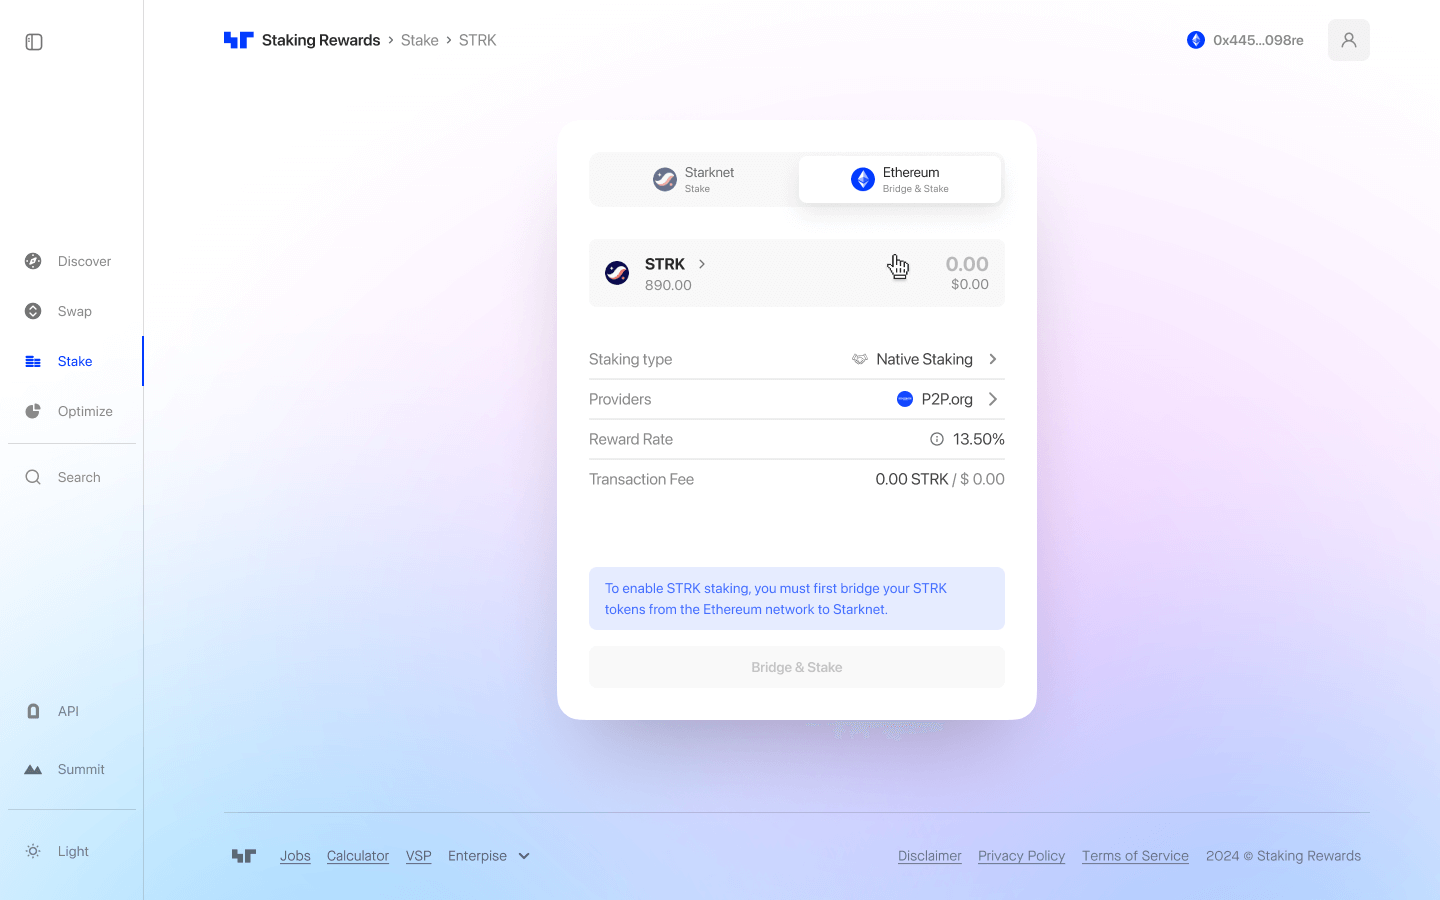
Click the “Bridge & Stake” button to proceed.
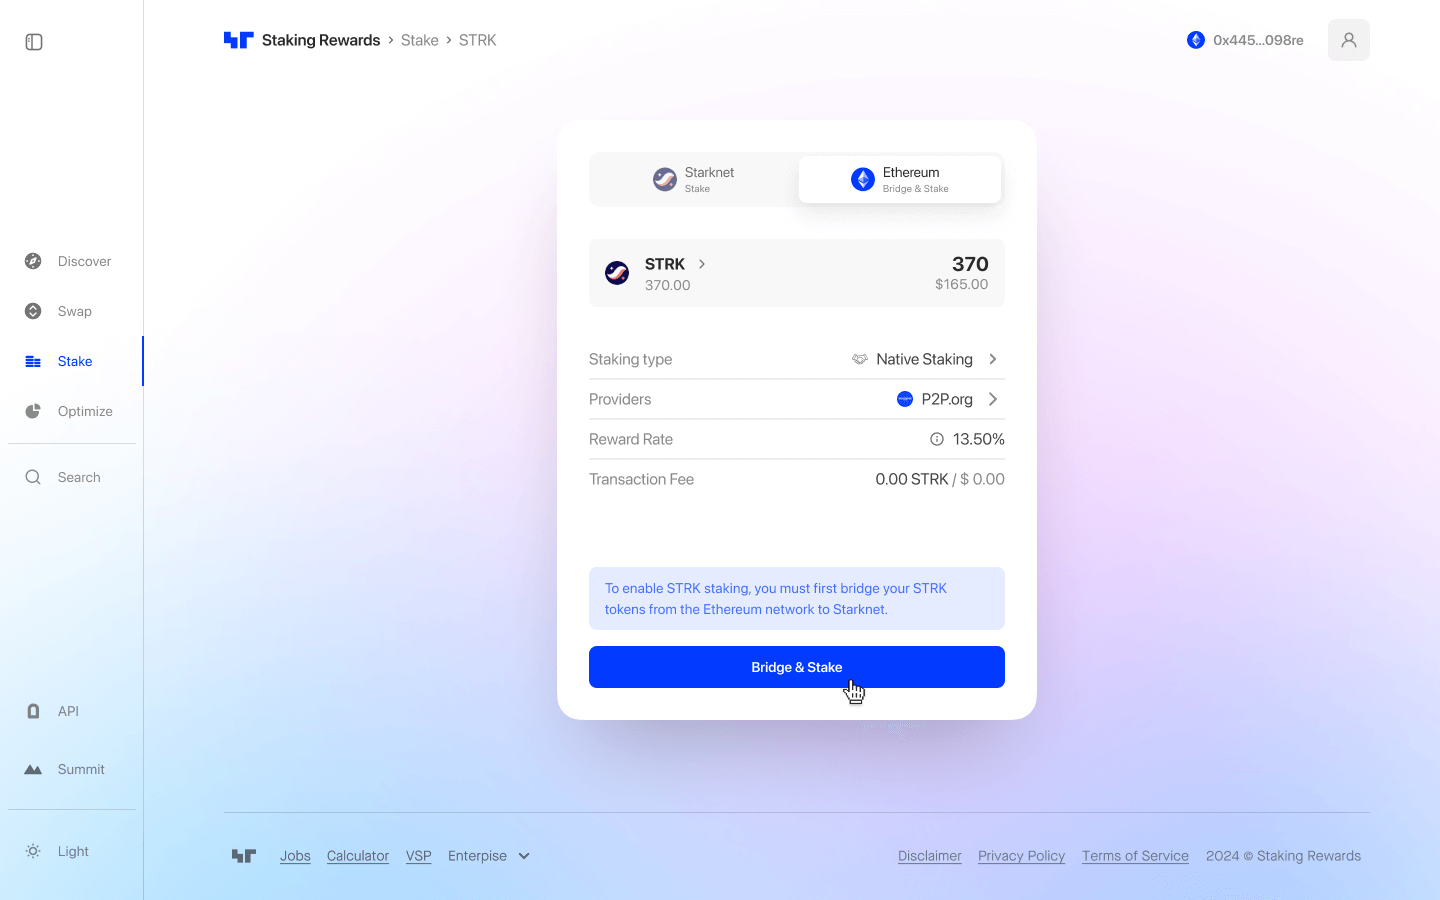
Confirm the transaction in your Ethereum wallet and then wait for the transaction to be approved. The bridging process can take up to 3 minutes to complete.
Important: There is no risk of interrupting the bridging process, however we do recommend that you leave the window open until the bridging has complete for full visibility on the status of completion.
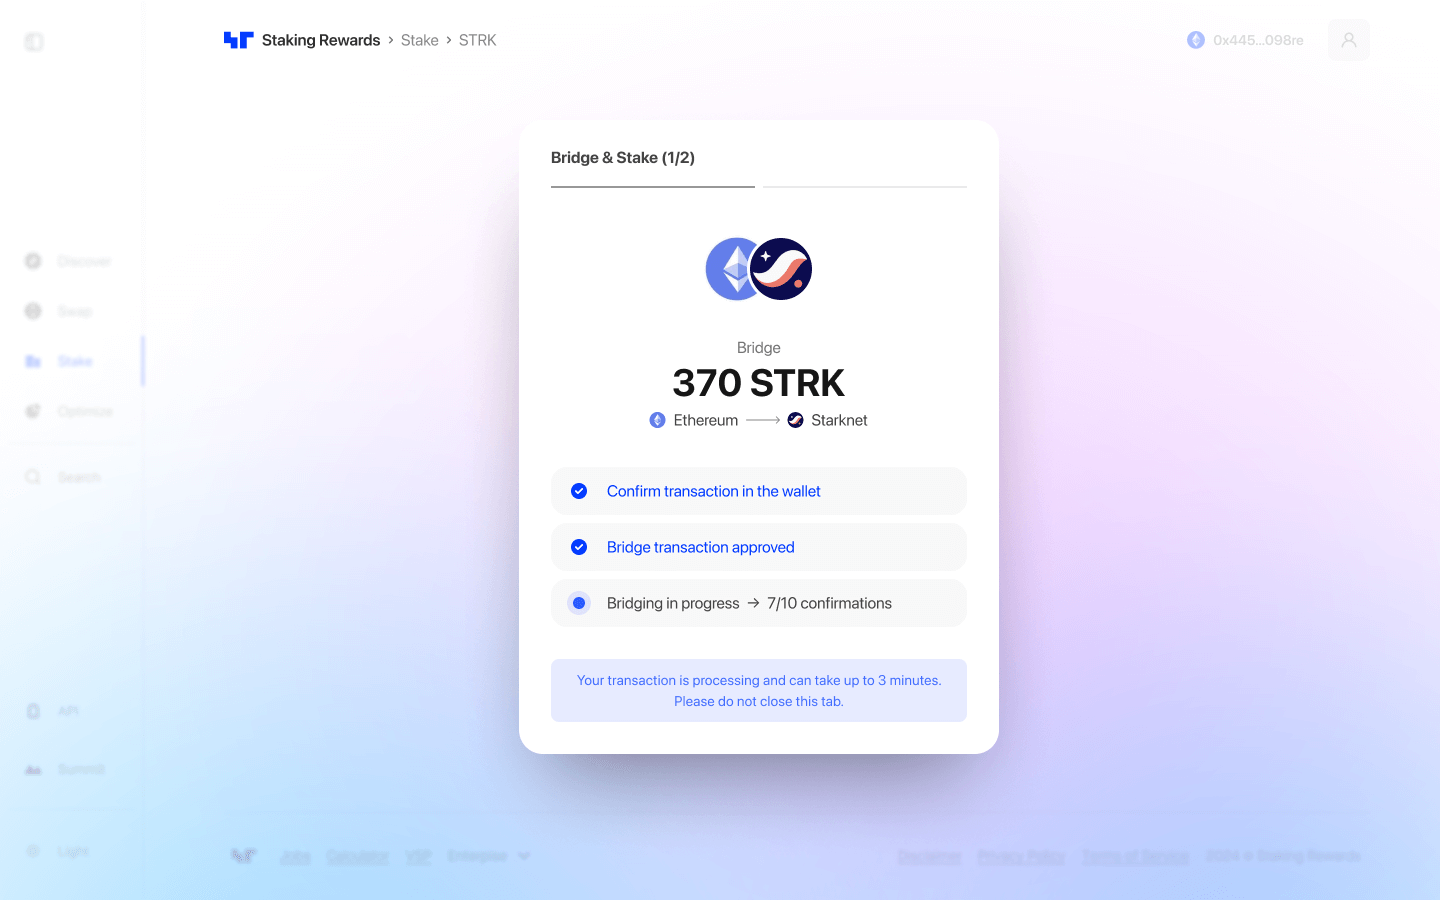
Step 3: Stake your STRK on Starknet (L2)
Now that your STRK has successfully bridged from Ethereum (L1) to Starknet (L2), you can proceed to staking your STRK.
First, enter the amount of STRK you would like to stake.
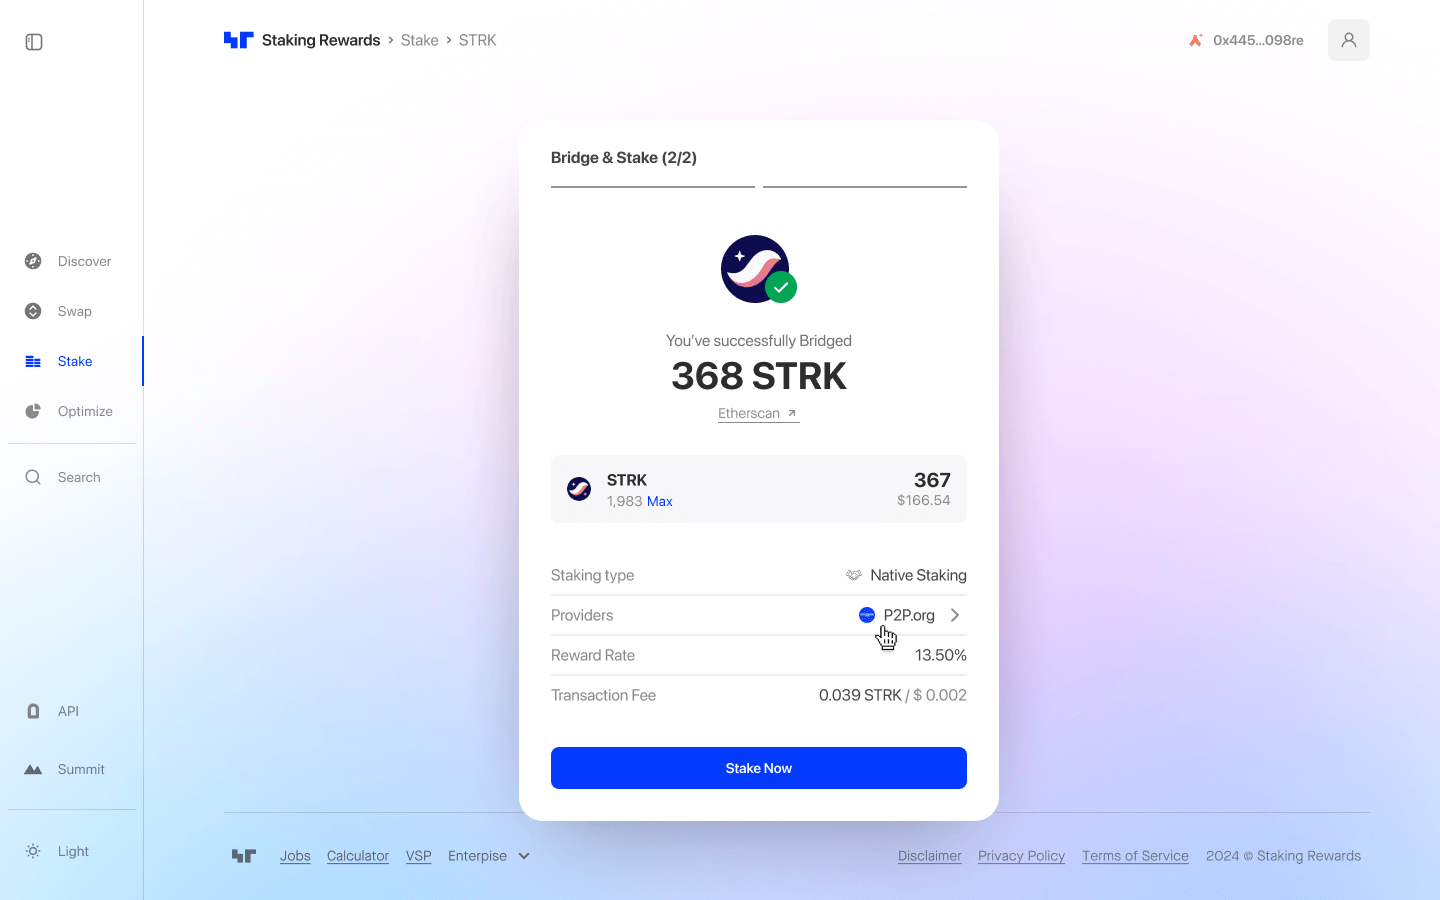
Next, select a Starknet provider (validator) you would like to stake with and then click “Continue to Stake”.
Note: The ordering of Starknet validators in the app is randomized, unless a particular validator is sharing a deeplink with their validator pre-selected.
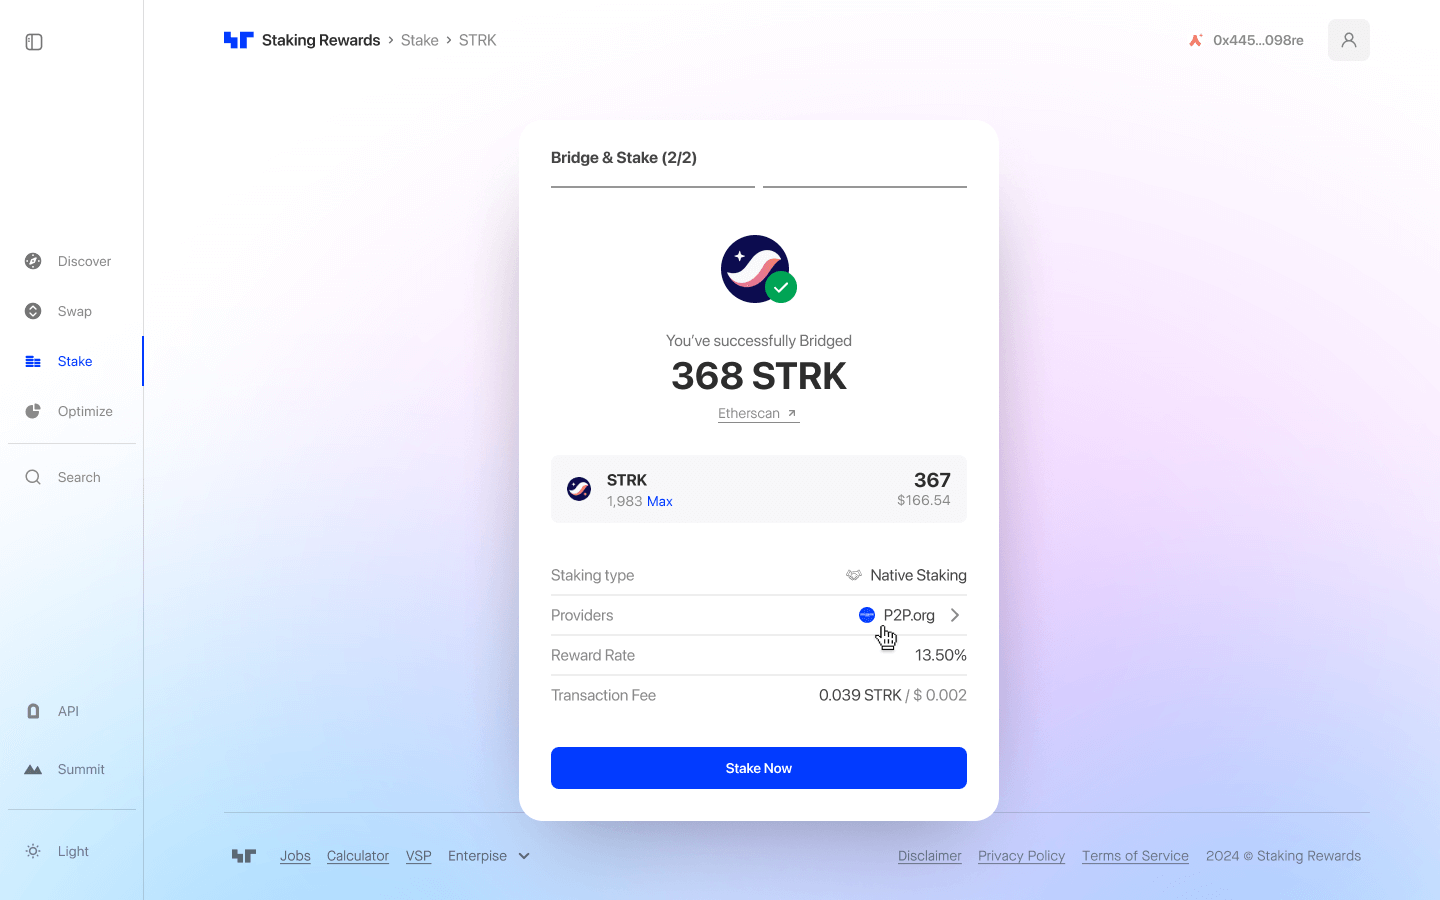
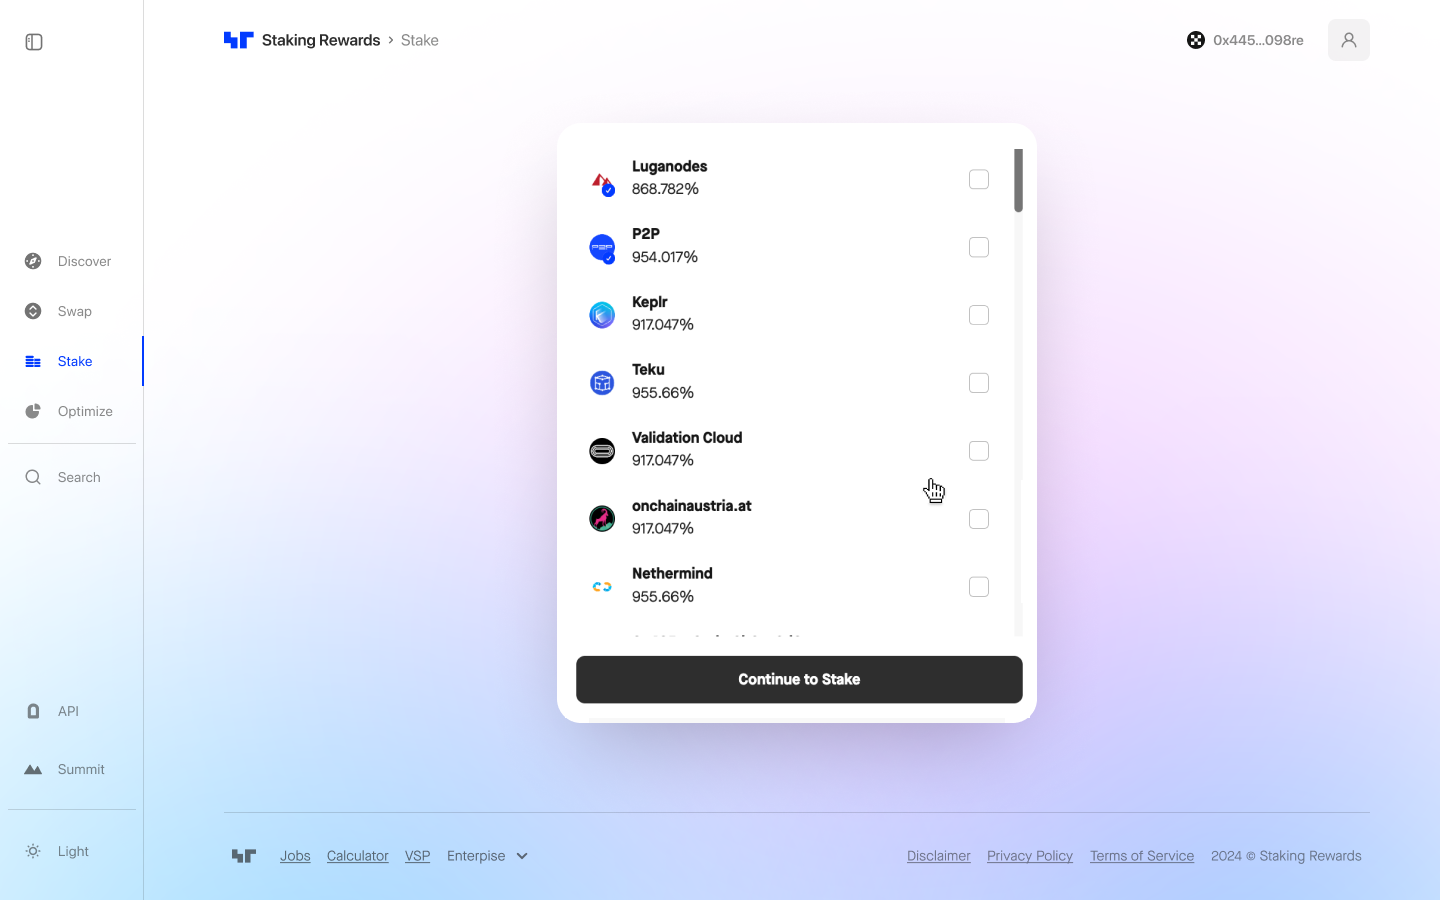
Confirm the transaction in your Starknet wallet, then wait for it to be processed to complete staking your STRK.
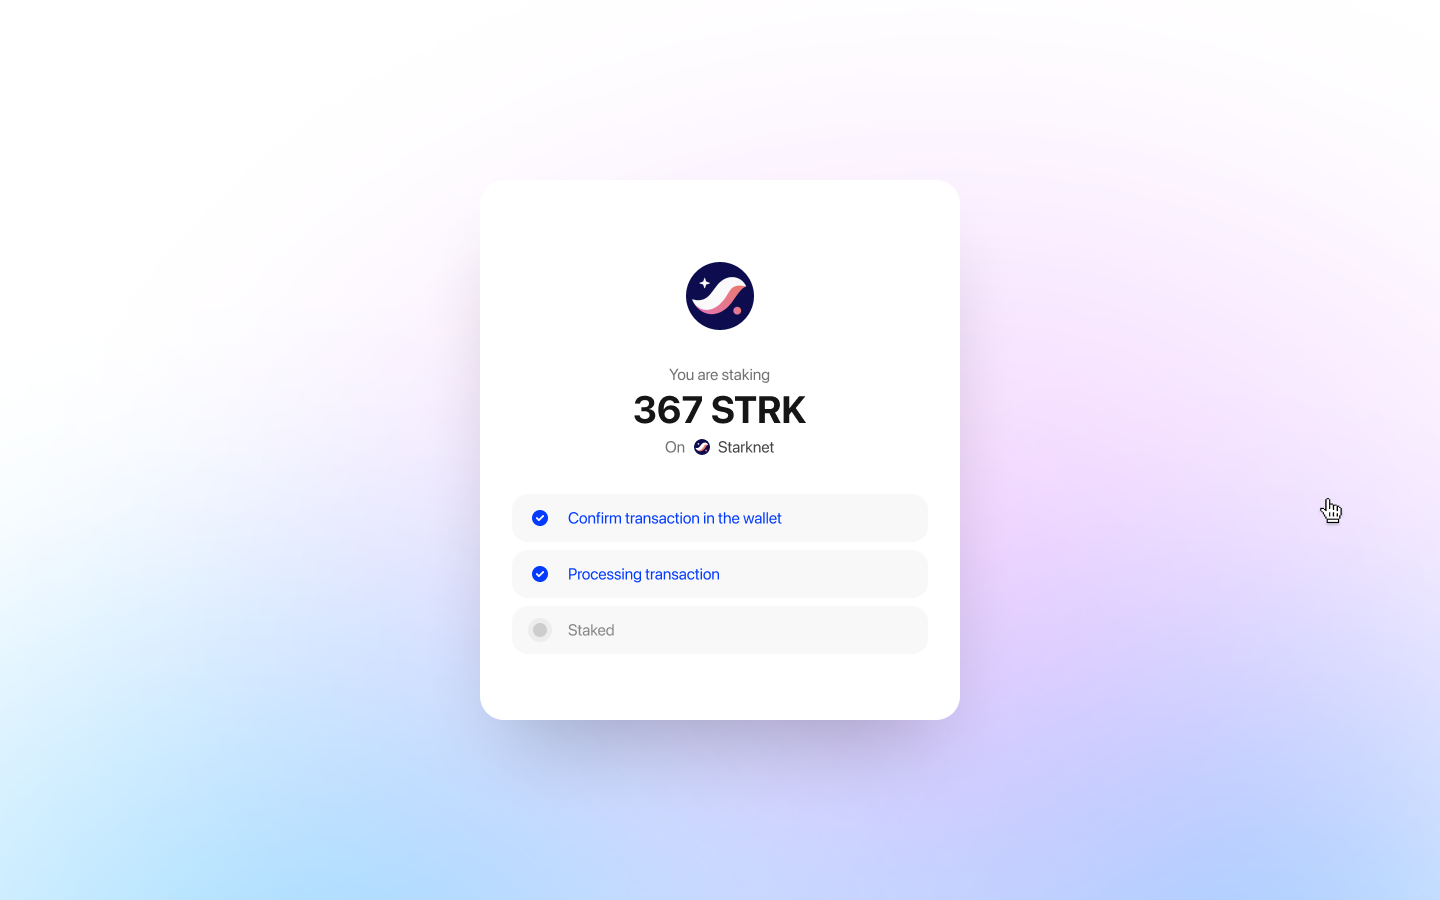
Step 4: View your staked STRK position
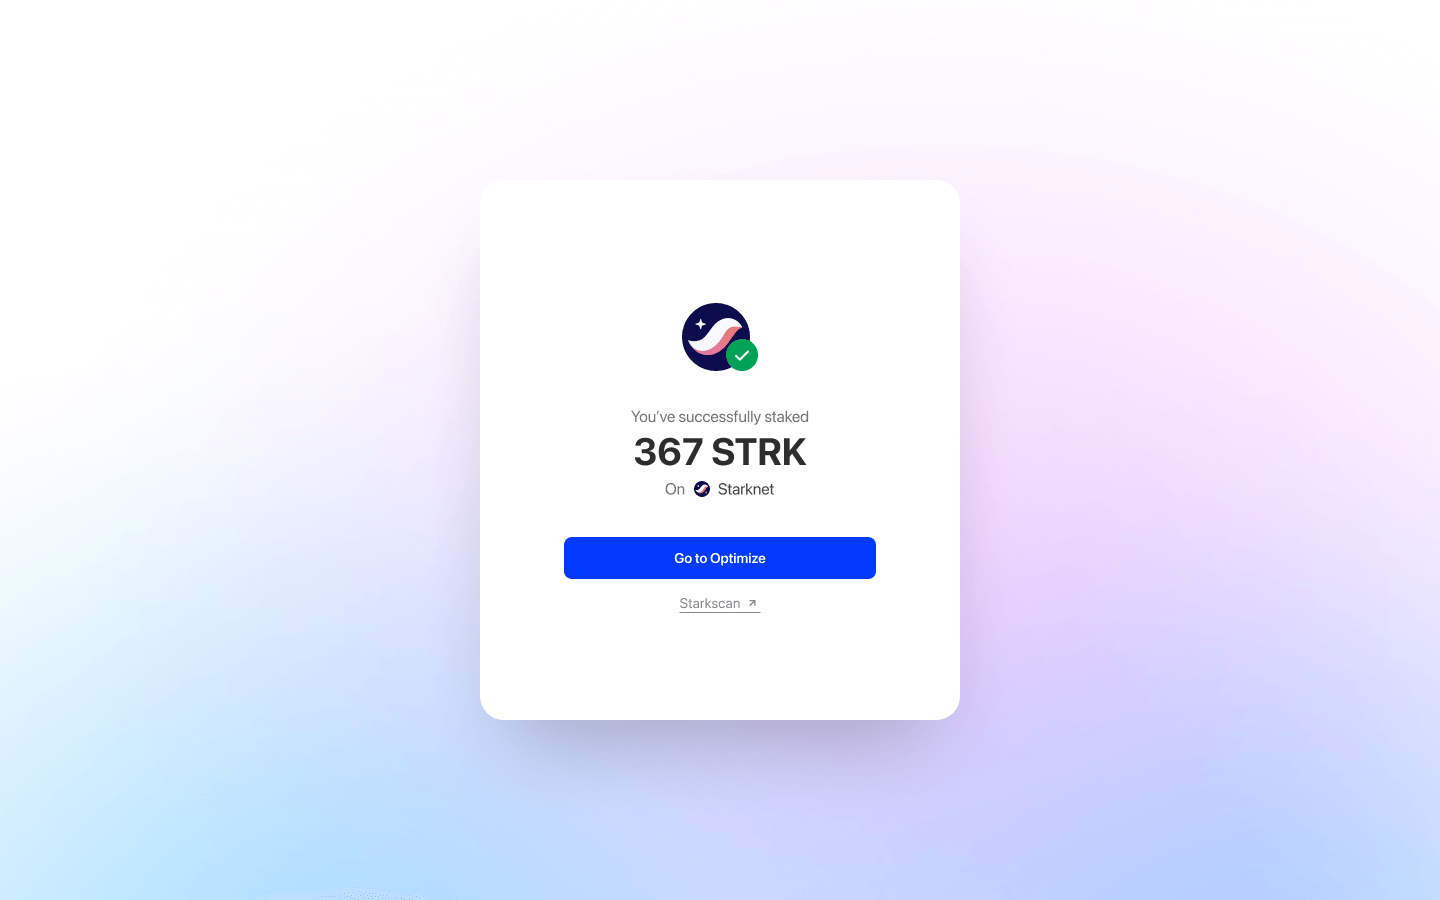
Finally, click the "Go to Optimize" button to view your STRK staked position in the Staking Terminal. You can also view the completed transaction on Starkscan.
If you have any questions on how to bridge and stake your STRK, head to our Discord and create a support ticket.



Institutional-Grade Research
Delivered to Your Inbox
Join 12,000 institutional allocators worldwide. No spam, unsubscribe anytime.