Staking on Starknet: A Complete Guide on How to Stake Your STRK

This article will provide you a simple, step-by-step guide, on how to stake STRK and earn rewards via the STRK Stake App on stakingrewards.com.
If your STRK tokens currently live on Ethereum, follow our How to Bridge + Stake Your STRK (L1 to Starknet) guide.
Starknet is the first Layer 2 ZK-Rollup on Ethereum to enable direct to validator staking. STRK holders can stake from 26 Nov, the launch date for Starknet staking to go live on mainnet.
- How to stake STRK
- How to claim STRK staking rewards
- How to claim and stake
- How unstake & withdraw STRK
- How to switch STRK providers
- How to check your history
Follow the steps indicated in each section below to get started.
How to stake STRK
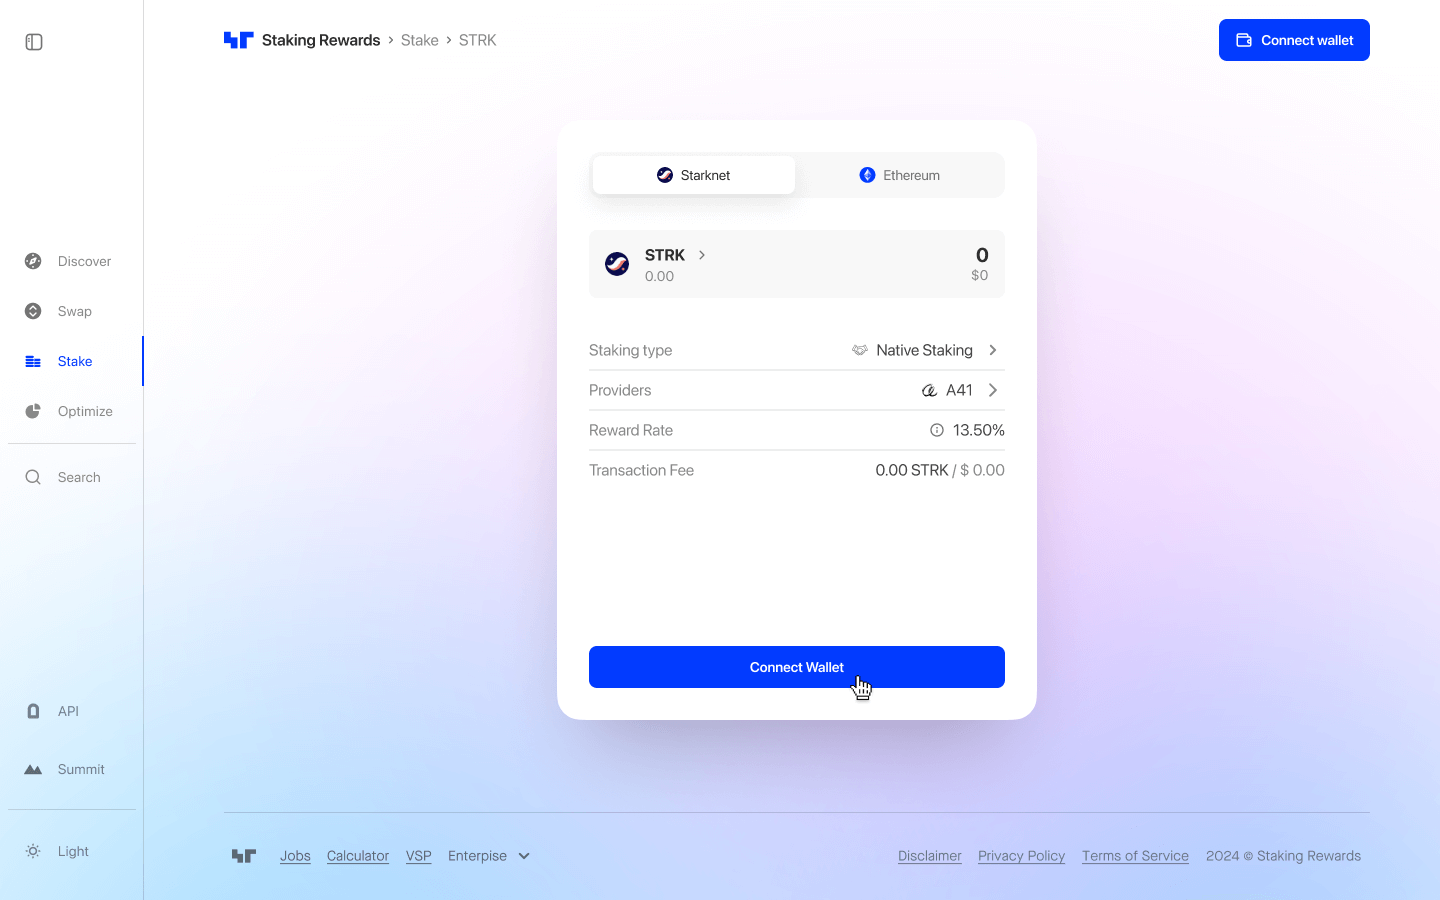
Step 1: Go to the Stake App & Connect your wallet
Navigate to the STRK Stake app, then connect your Starknet wallet (e.g., Argent X or Braavos).
Allow the application access and sign signature request, if you’re visiting the website for the first time.
Step 2: Choose a provider
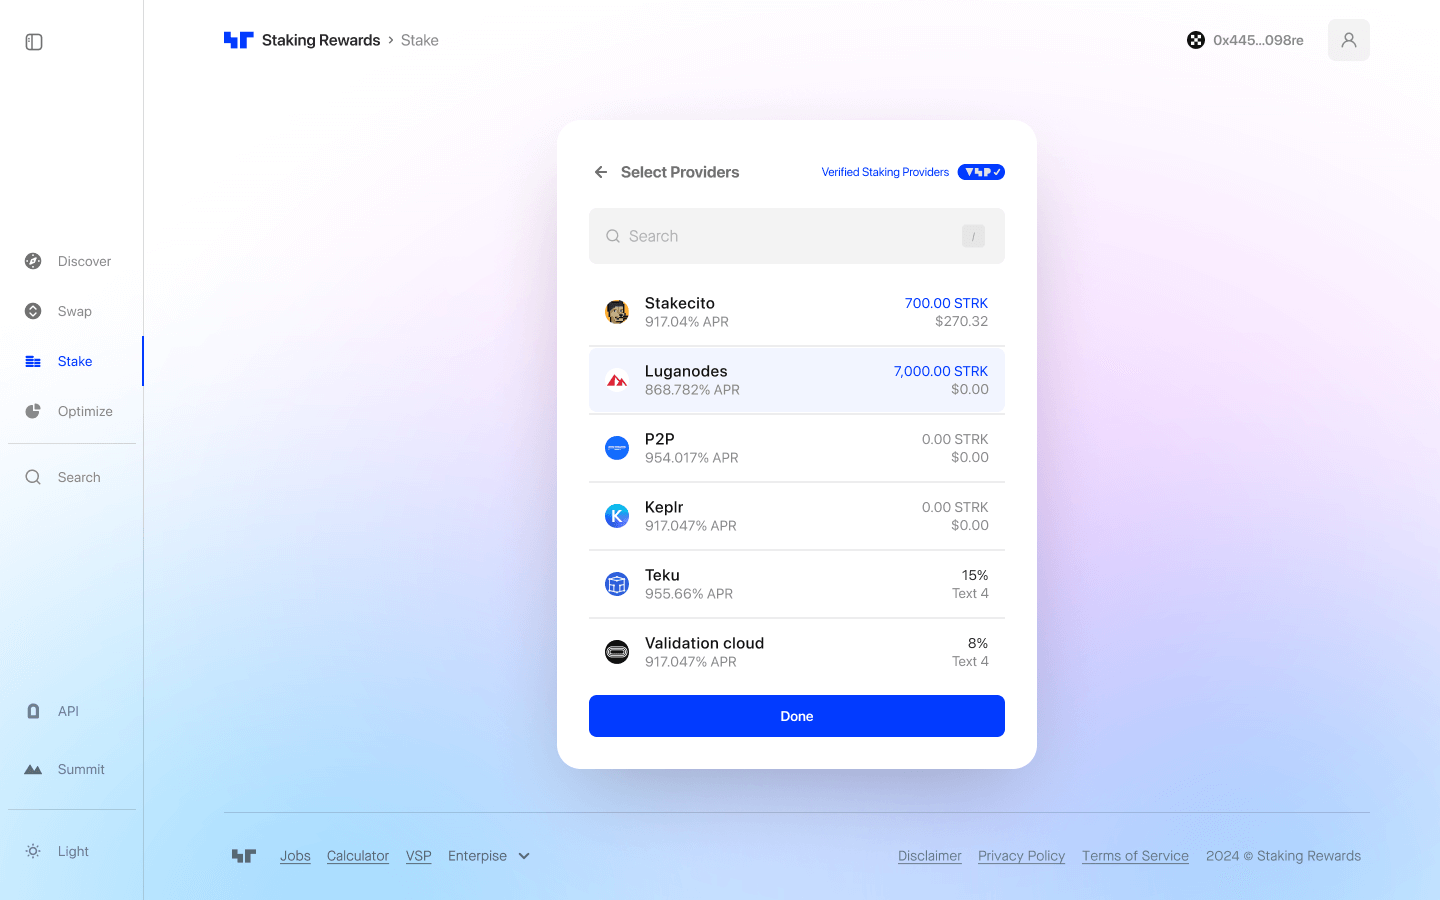
Choose a provider (Starknet validator) to stake with by clicking on the default displayed provider and selecting one from the list.
You can compare all providers side-by-side, including their reward rate and number of staked STRK via the Starknet asset profile.
Step 3: Enter amount of STRK
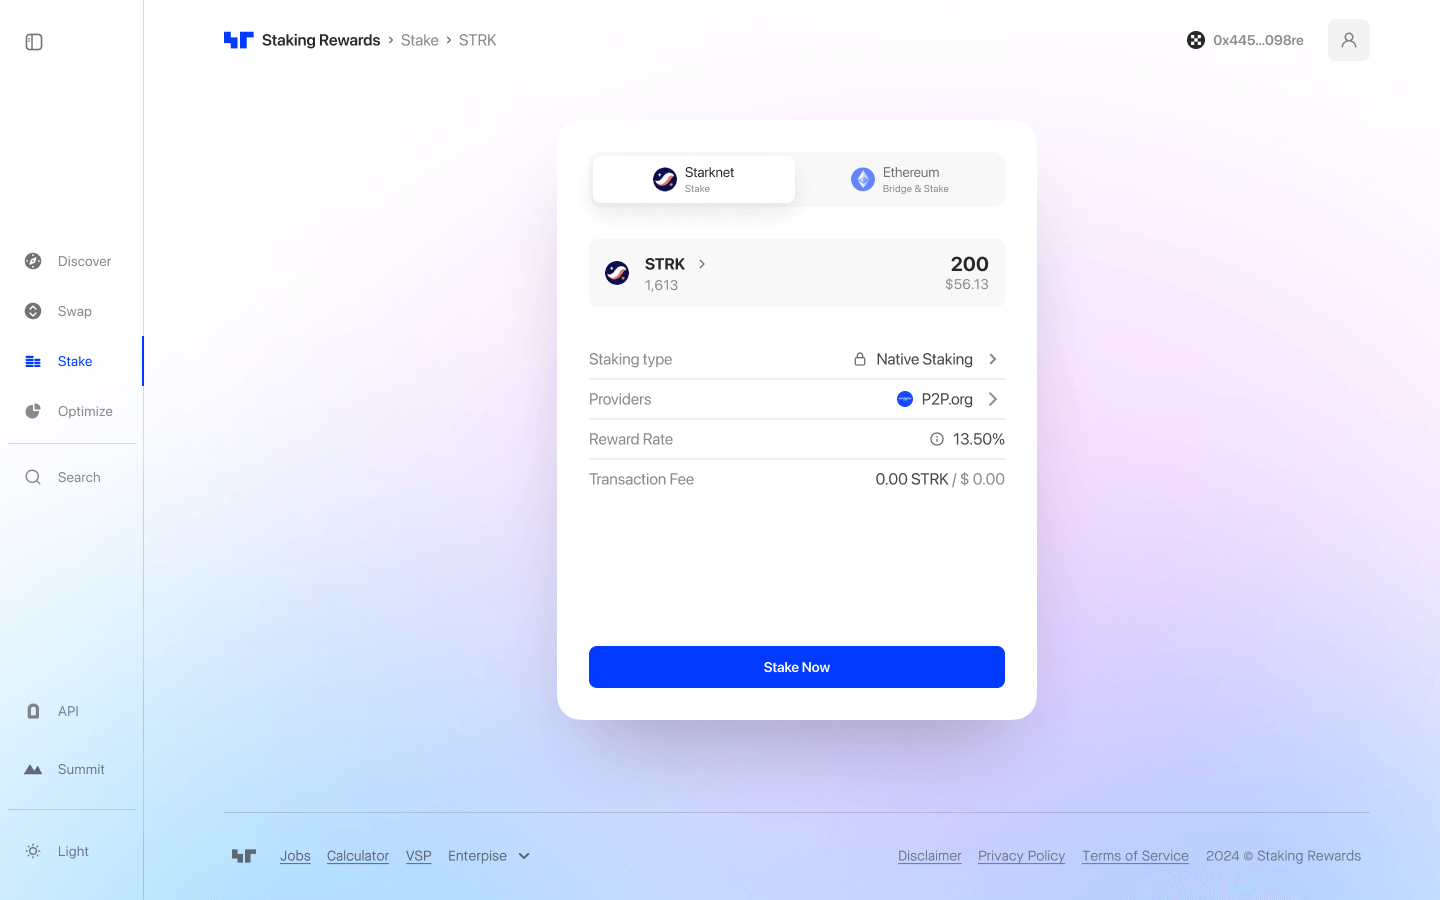
Input the amount of STRK you would like to stake.
Step 4: Stake your STRK
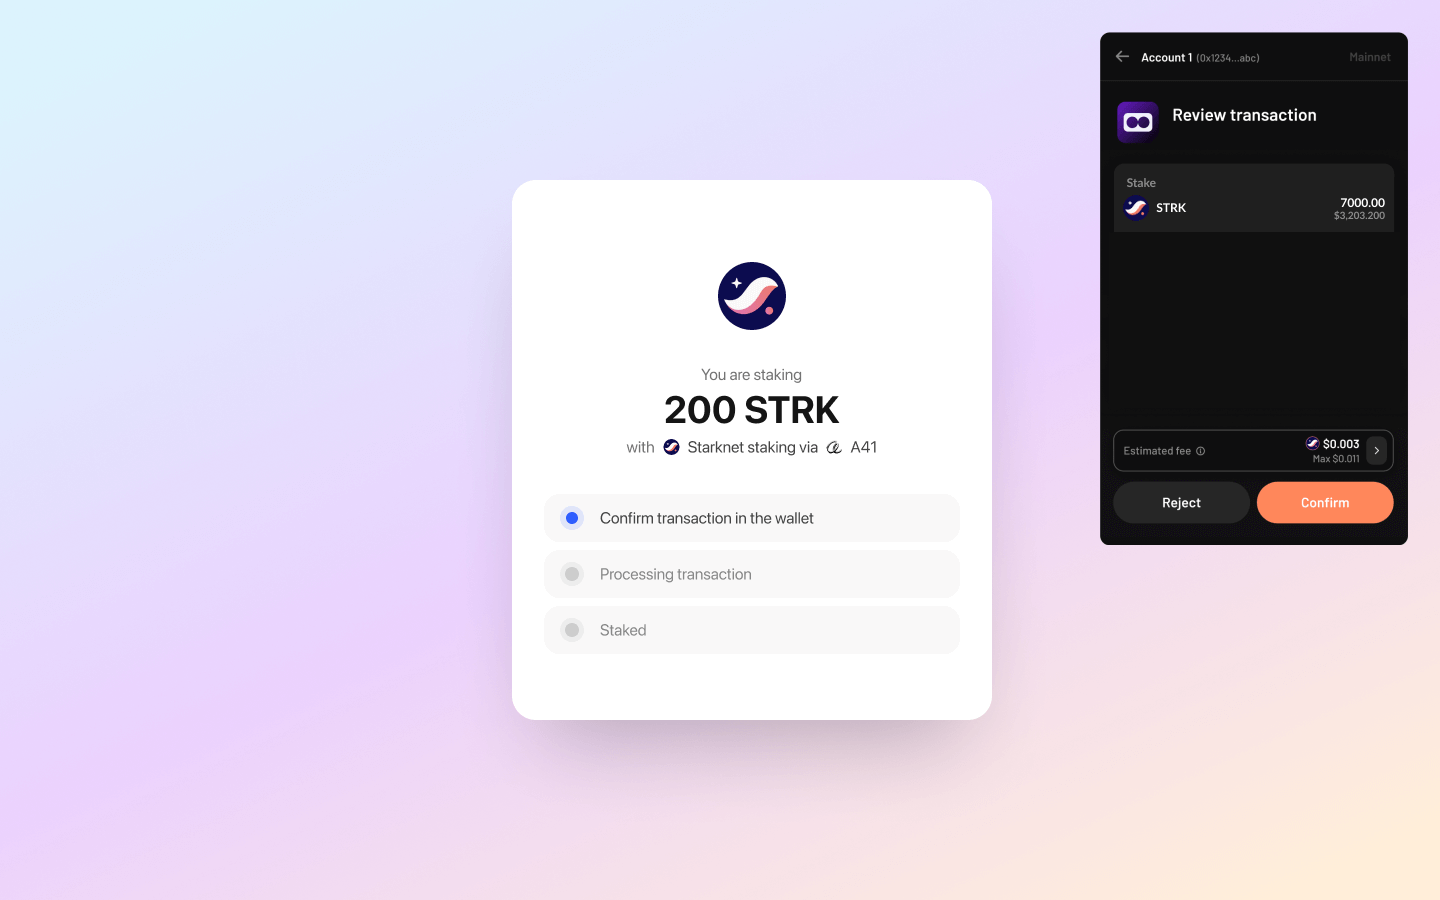
Click the “Stake now” button and then confirm the transaction in your wallet to finalize the staking process.
Step 5: Track your staked position
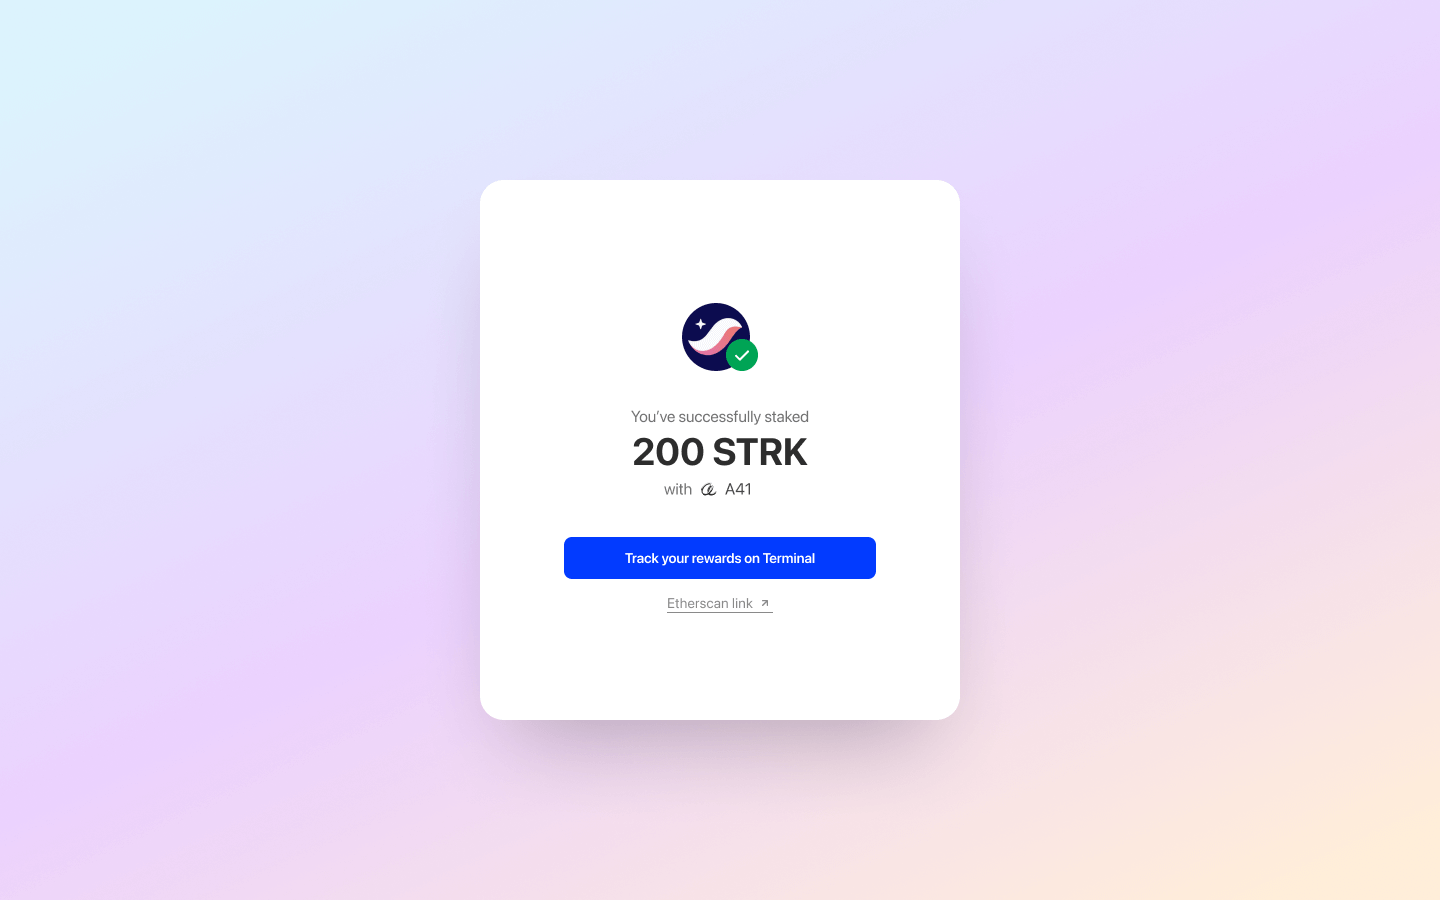
Congratulations you have successfully staked your STRK. Click the button to track your staked STRK position in the Staking Terminal. You can also check the transaction on Starkscan.
How to Claim STRK Staking Rewards
Step 1: Claim your rewards
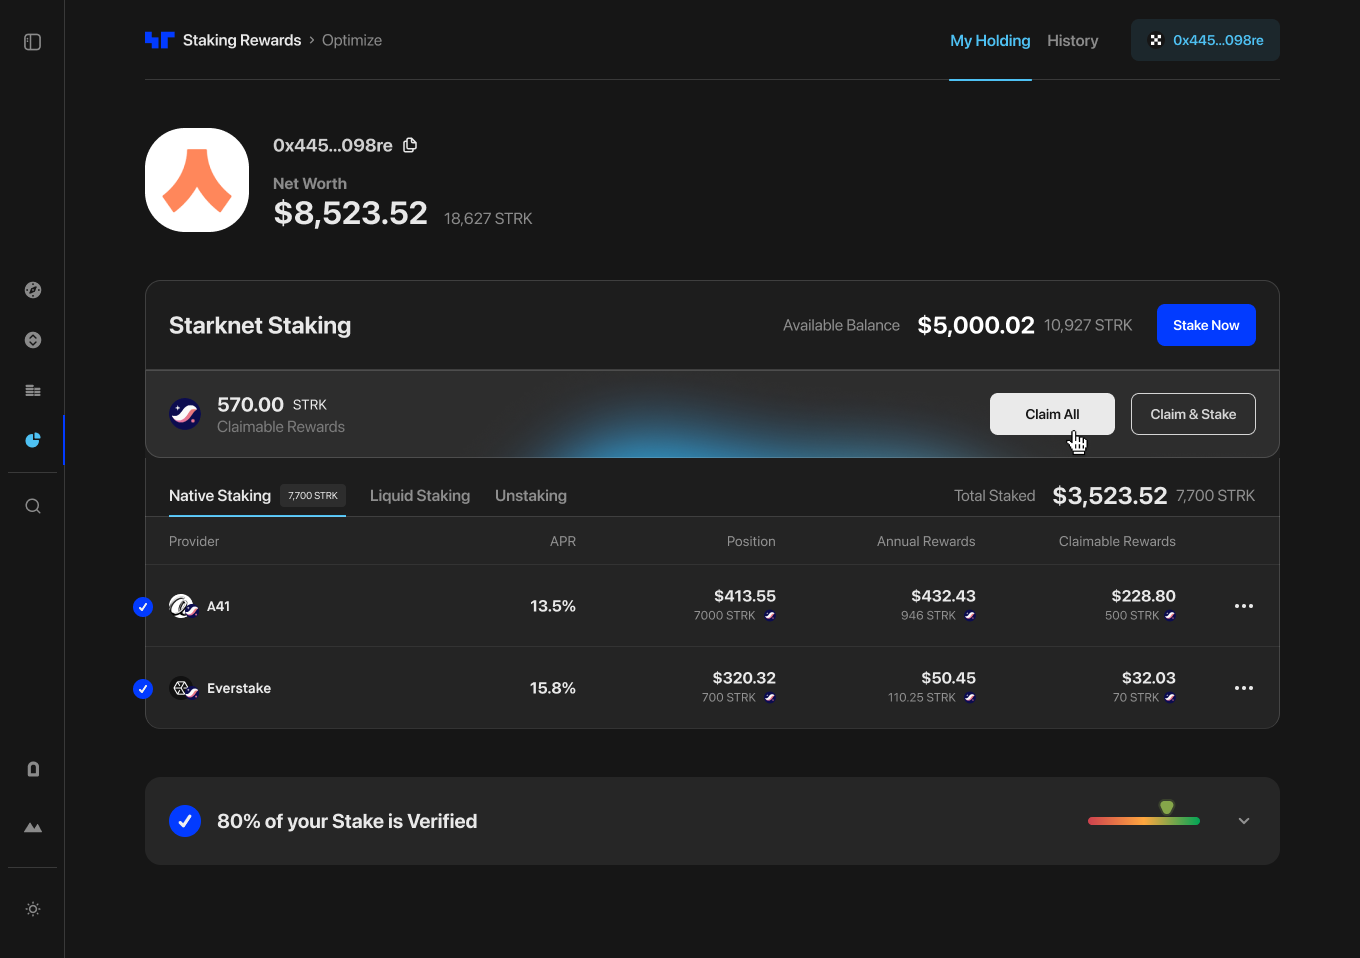
View your staked STRK position and check to see if you have any rewards to claim in the Staking Terminal.
To claim your STRK rewards, navigate to the Staking Terminal then click the “Claim All” button.
Step 2: Confirm the transaction
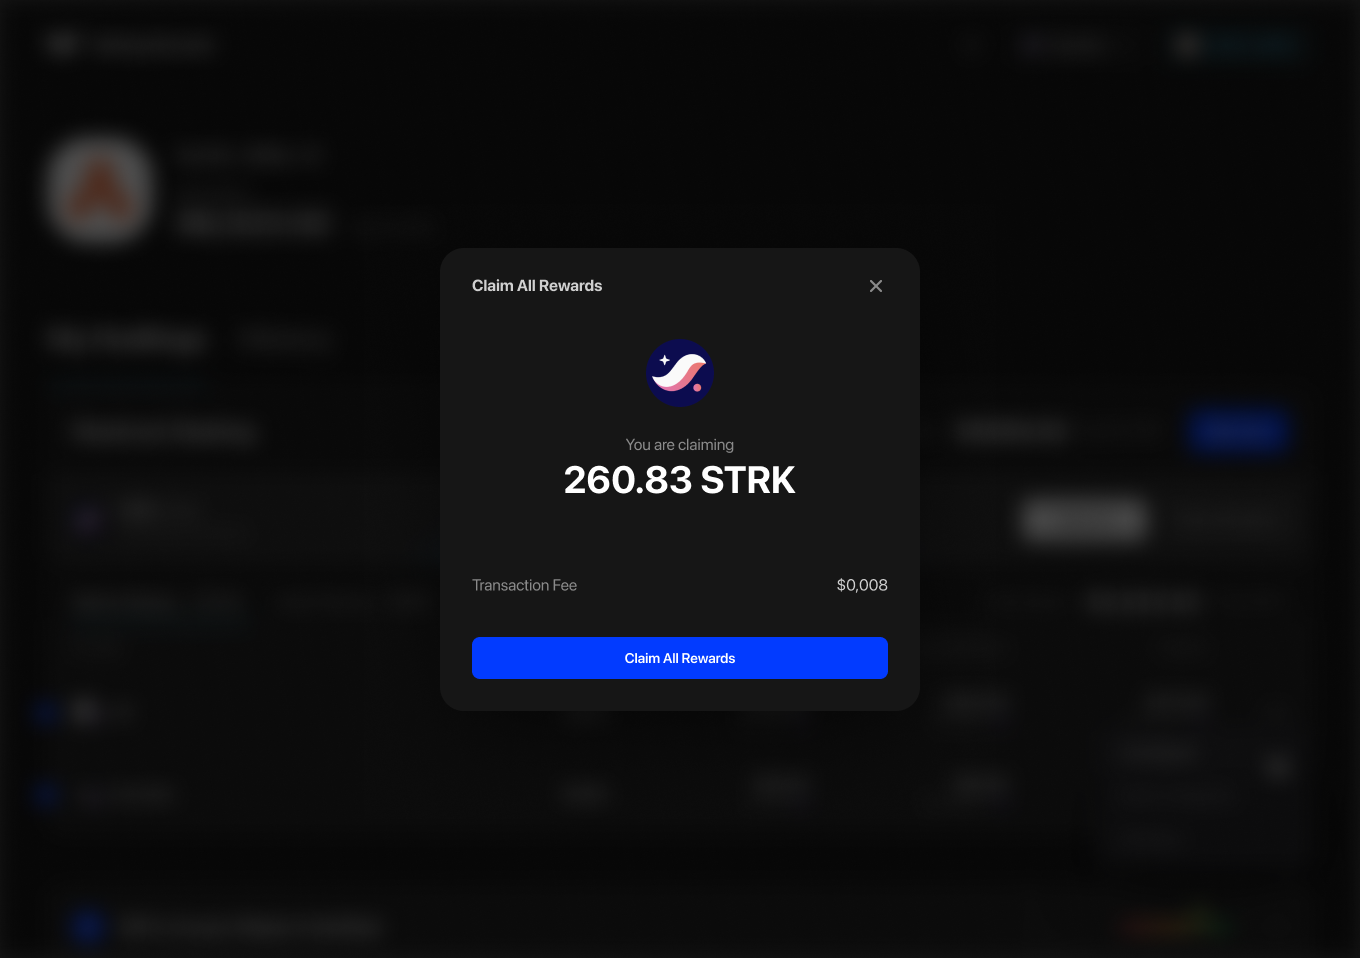
Proceed by clicking the “Claim All Rewards” on the next screen, then confirm the transaction to complete the process.
Step 3: Review your updated balance
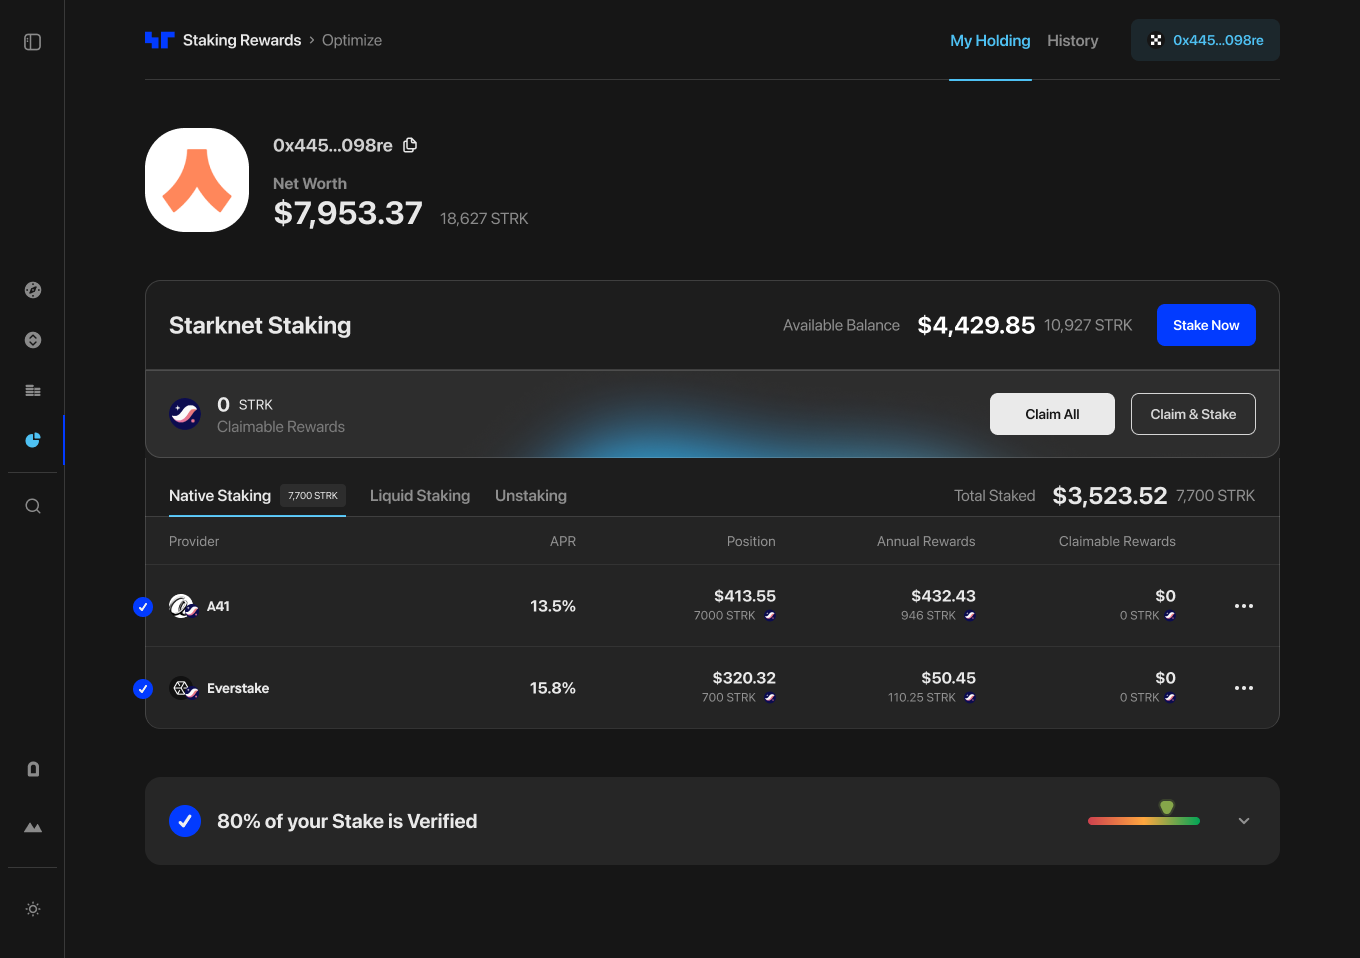
Once you have successfully claimed,, your rewards will be added to your “Available Balance” for you to review.
How to Claim and Stake Your Rewards
If you would prefer to claim and restake your rewards, you can do so by following these simple steps.
Step 1: Initiate claim and stake
To get started go to the Staking Terminal, connect your Starknet wallet. Once connected, click the “Claim & Stake” button.
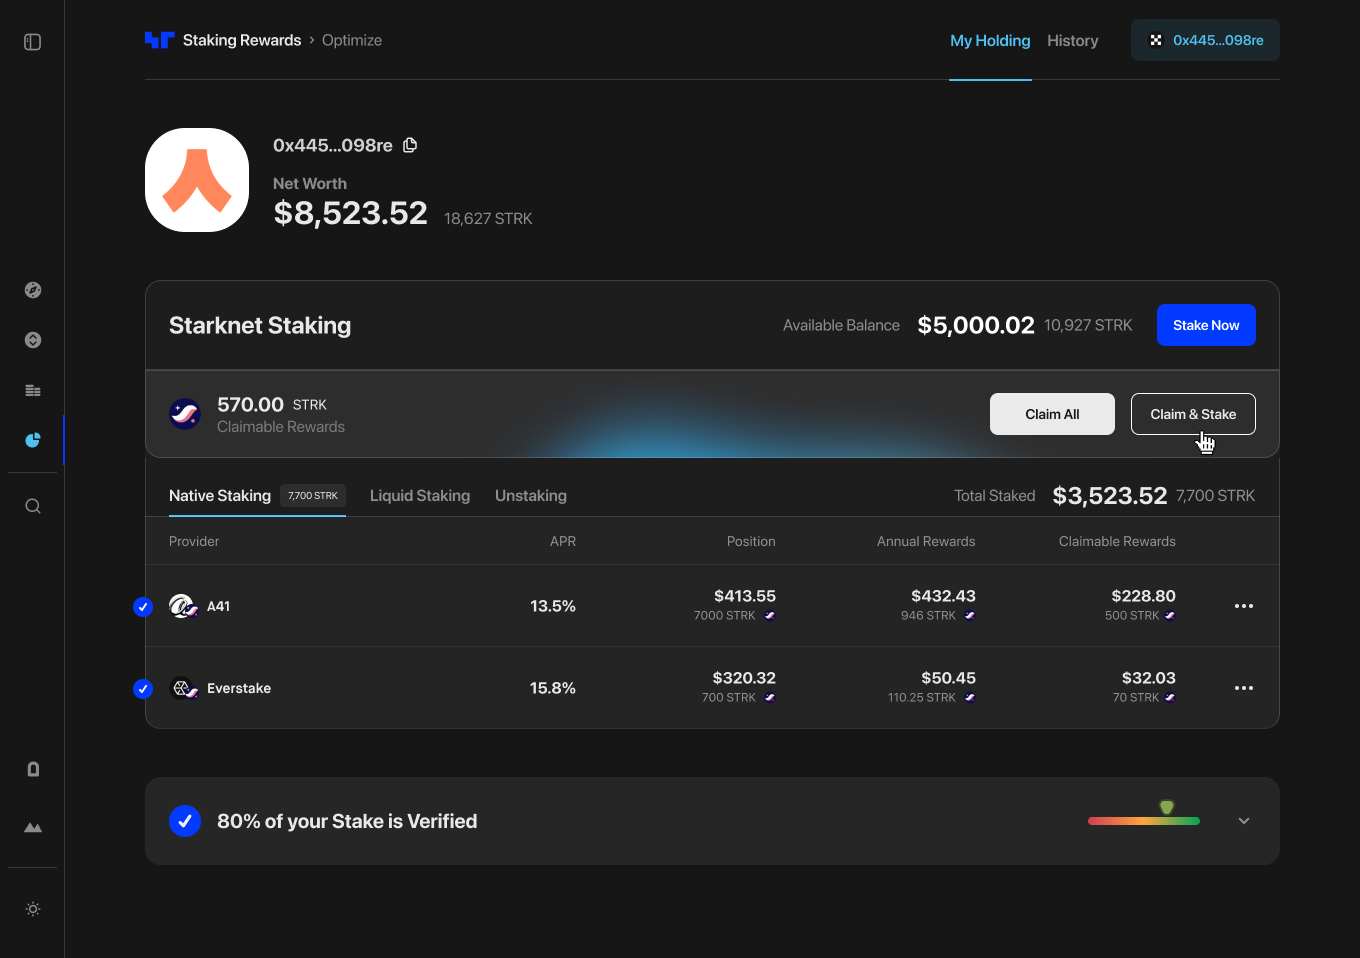
Step 2: Claim your rewards
Next, click the “Claim All Rewards” button and confirm the transaction in your wallet.
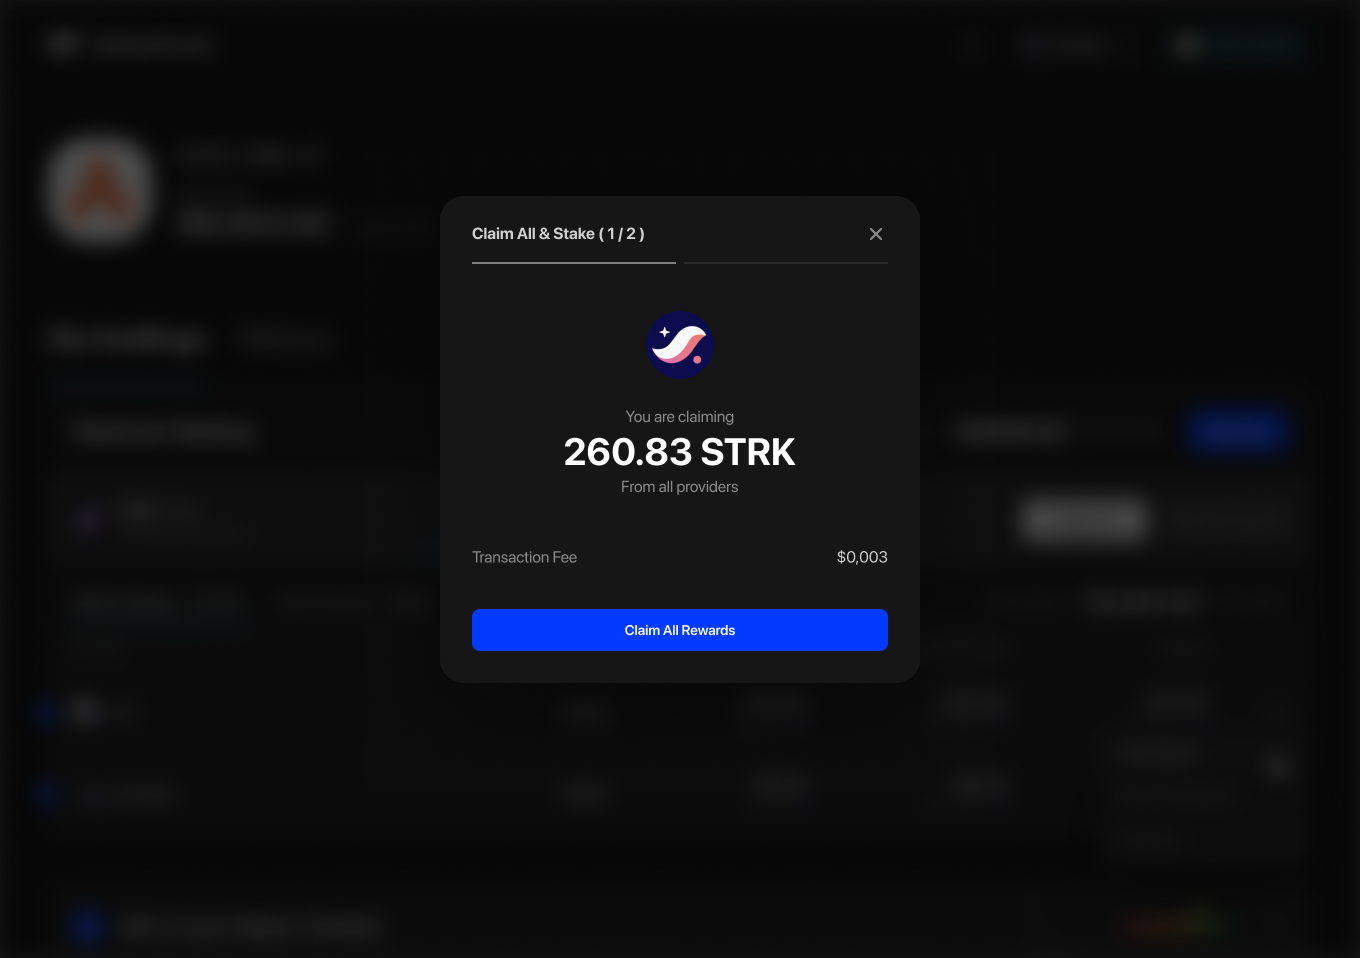
Step 3: Stake your claimed rewards
Next, you will be prompted to stake your claimed rewards. This could be with the same provider you currently stake with, or another provider of your choosing.
To switch providers, click the default provider and select another from the list. Click “Stake” and sign the transaction in your wallet.
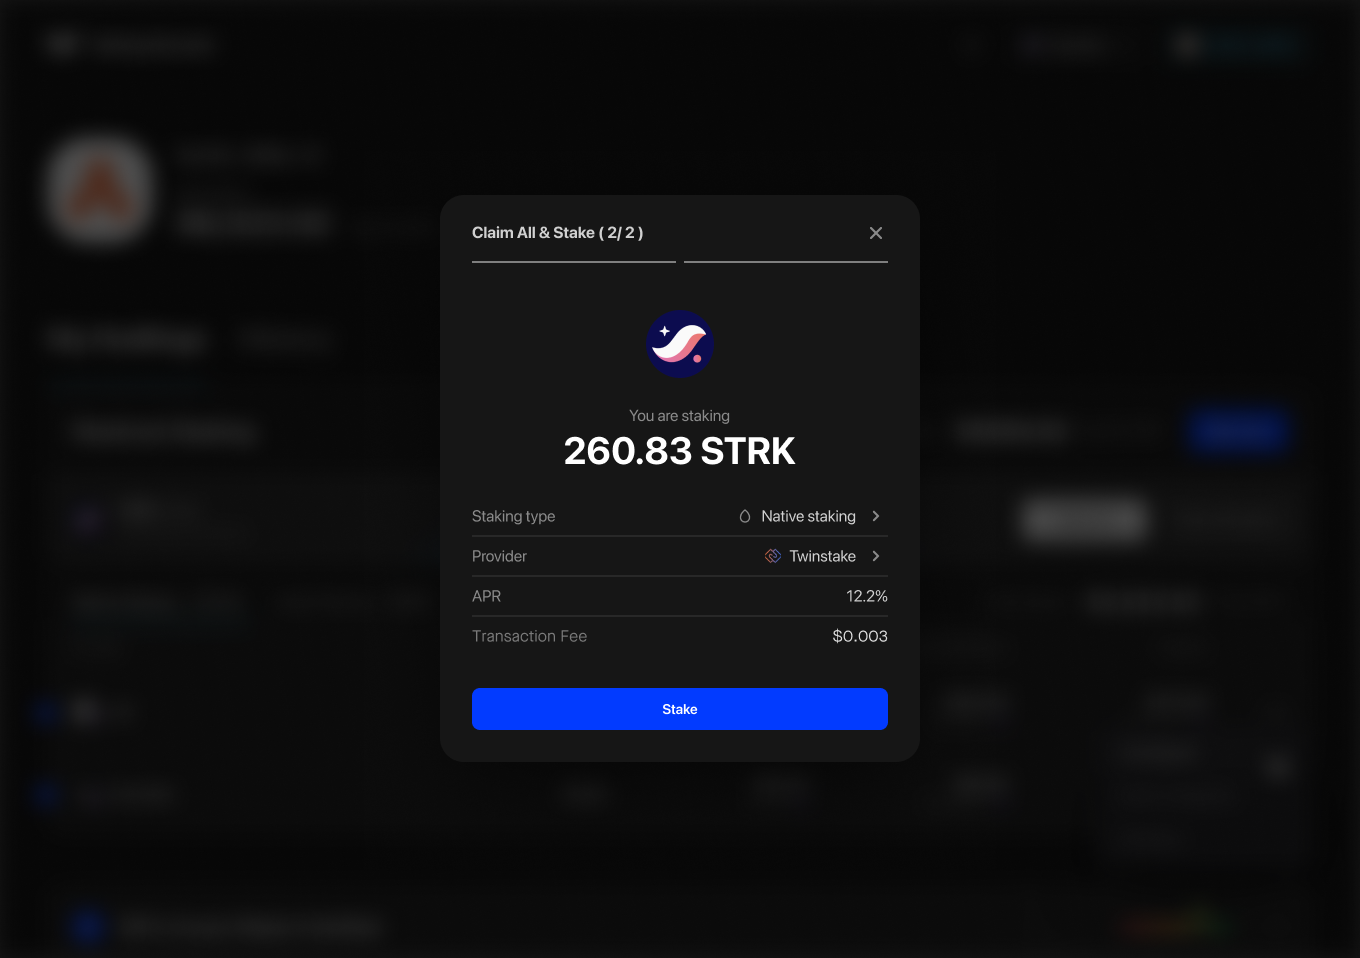
Step 4: Review your staked STRK
Once the transaction has been processed you will be prompted to check your staked position in the Terminal. Alternatively, you can view the transaction on Starkscan.
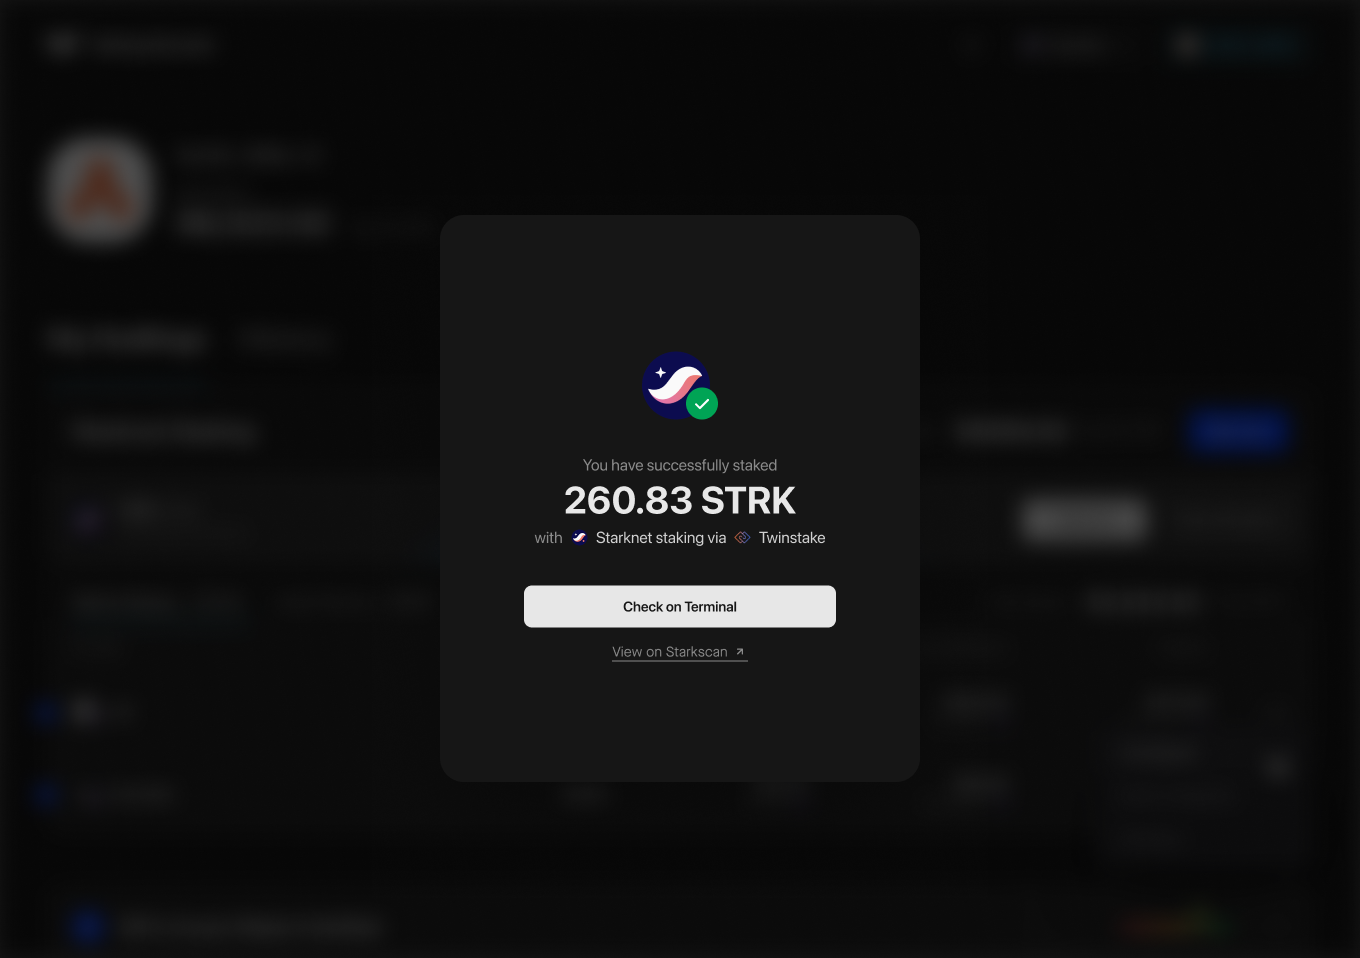
How Unstake & Withdraw STRK
Step 1: Initiate the unstake
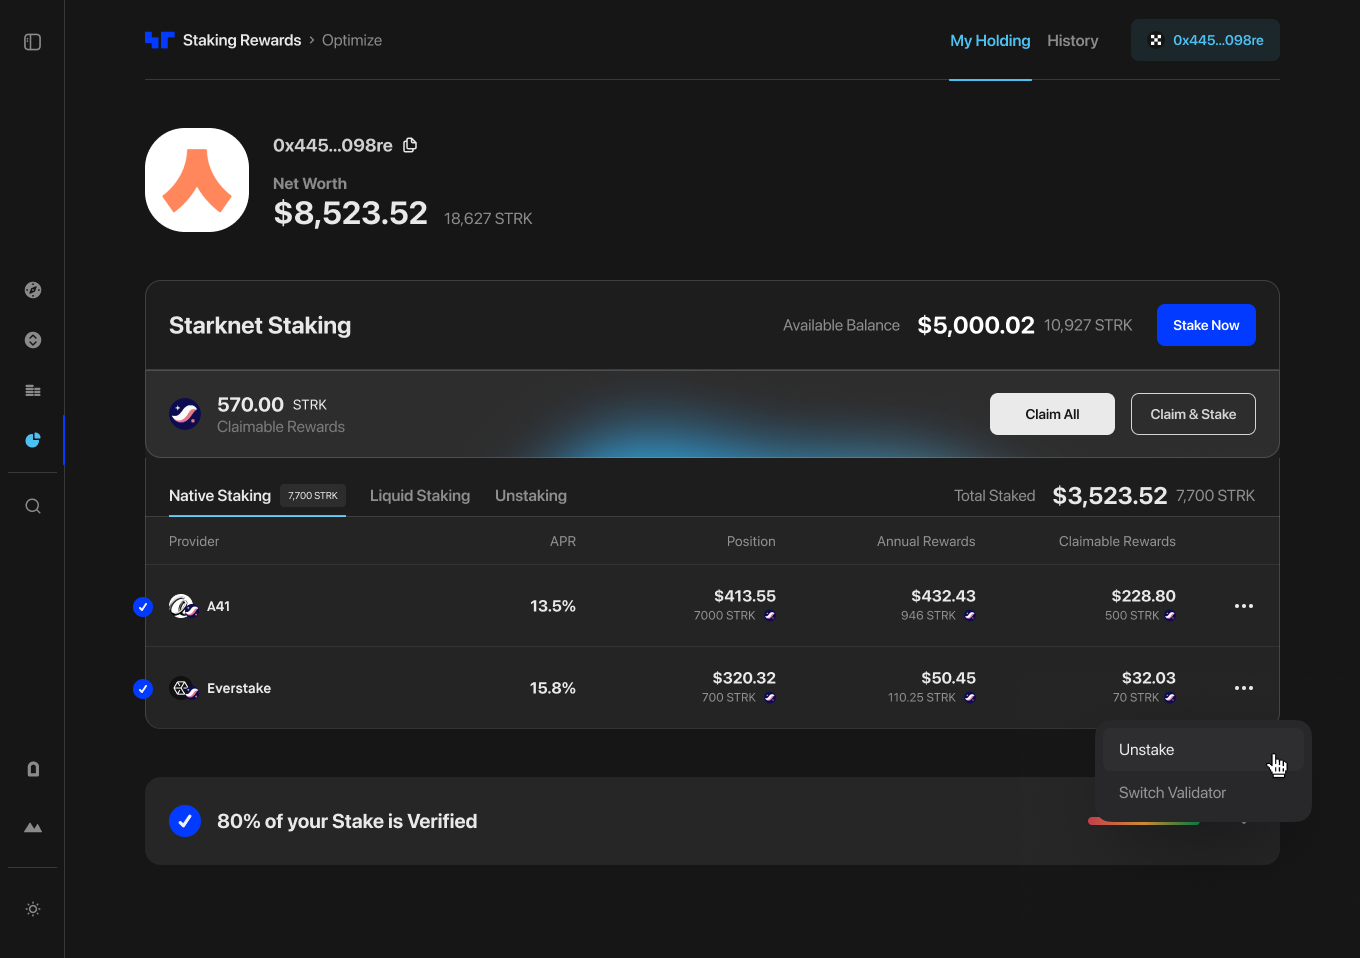
In the Staking Terminal, click the icon with three dots (...) next to the position you would like to unstake, then click “Unstake” from the pop out menu.
Step 2: Select unstake amount
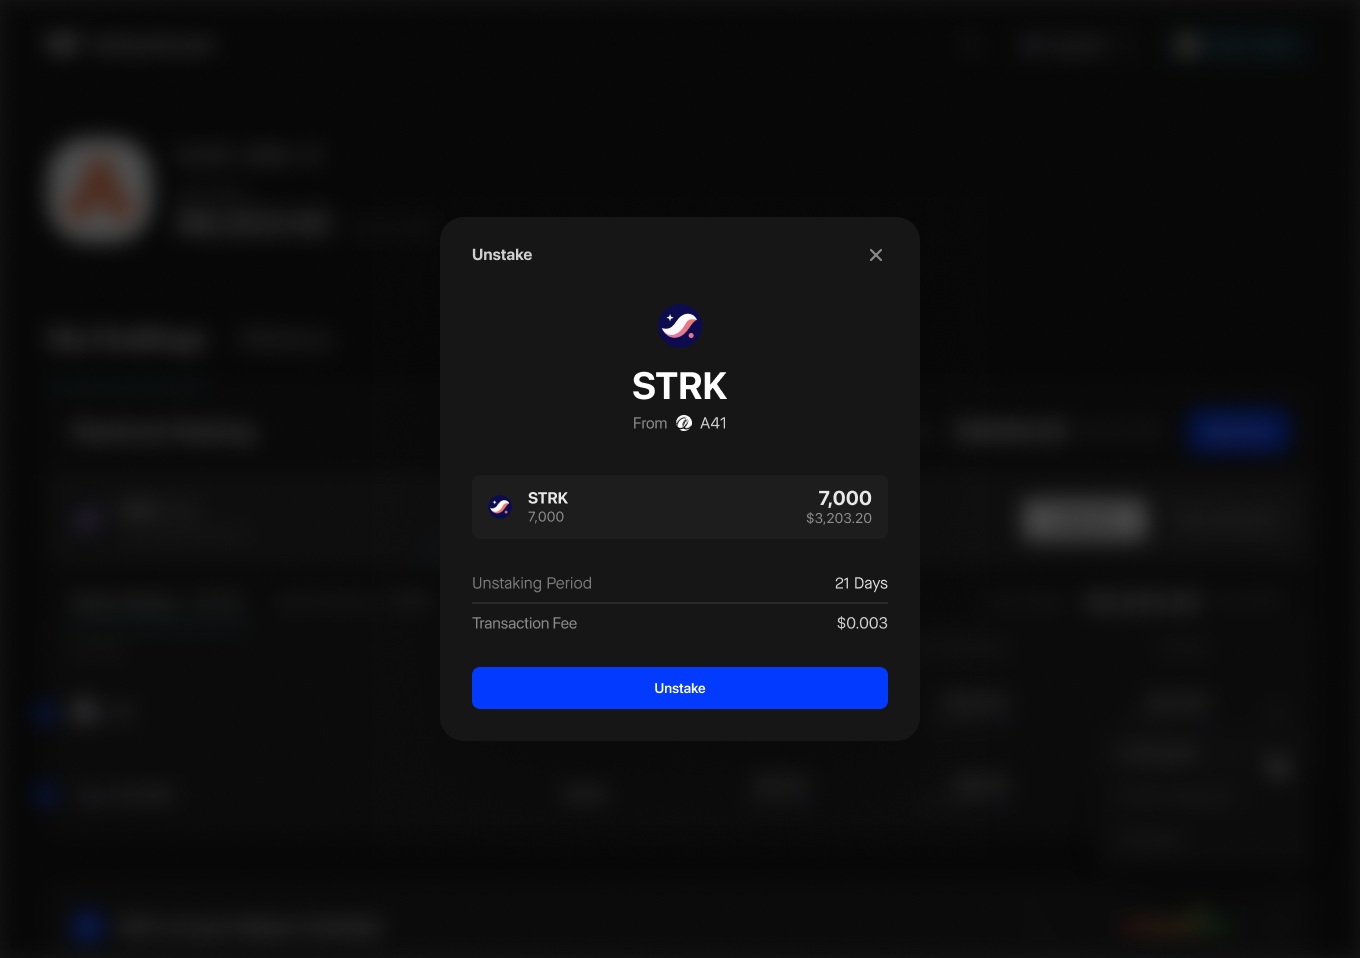
Select the amount of STRK you would like to unstake from the chosen provider. The input is prefilled with the total staked amount.
Note: The is a period of 21 days for your assets to be unbonded (unstaked).
Step 3: Approve transaction & review
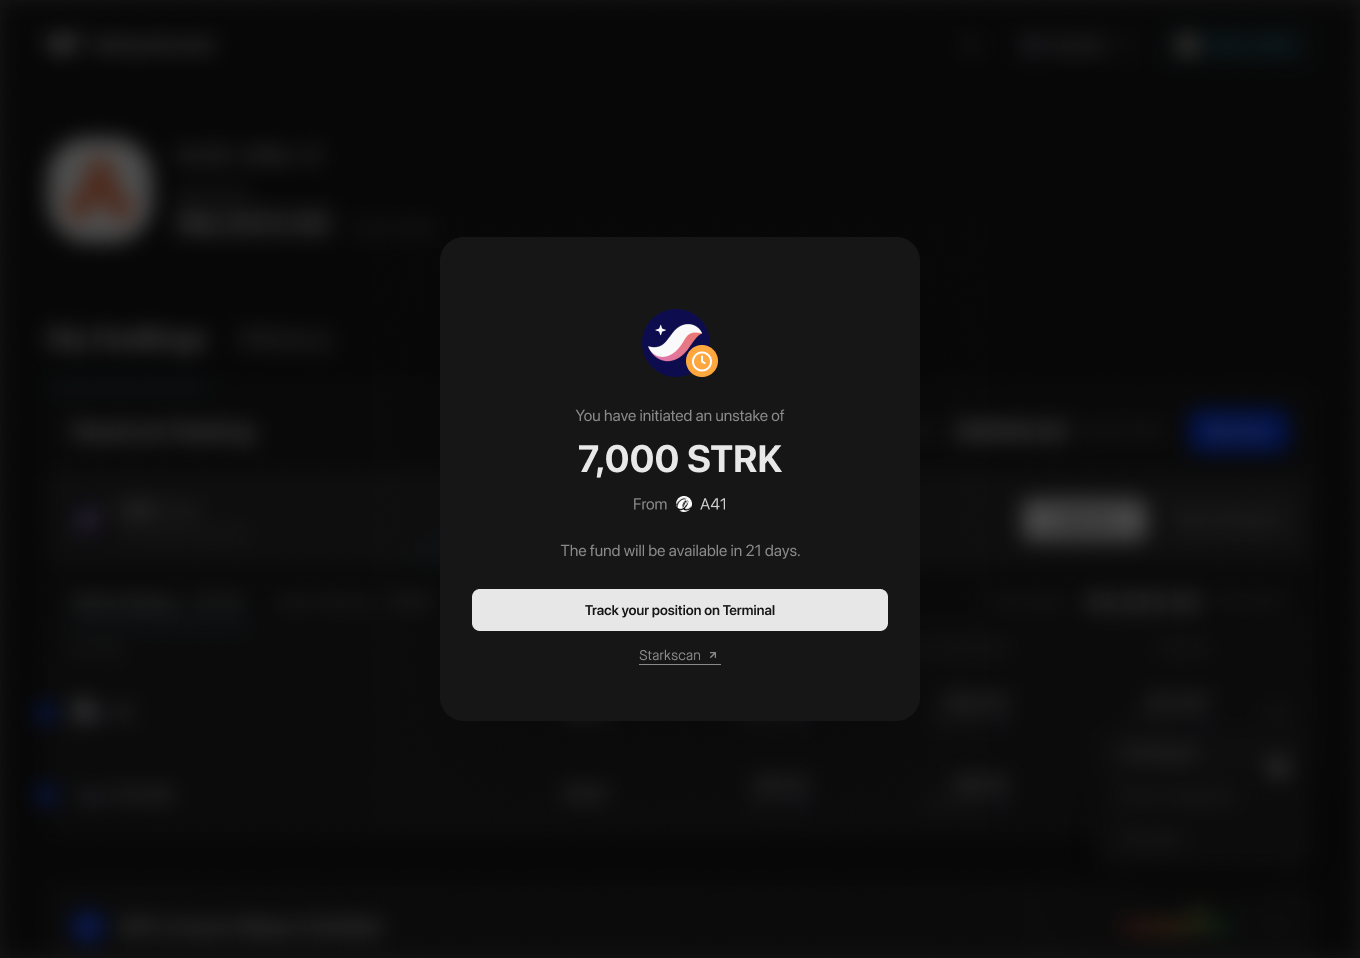
Once you have approved the transaction, you can track your undelegated position in the terminal or view the transaction on Starkscan.
Step 4: Track your unstaked position & withdraw
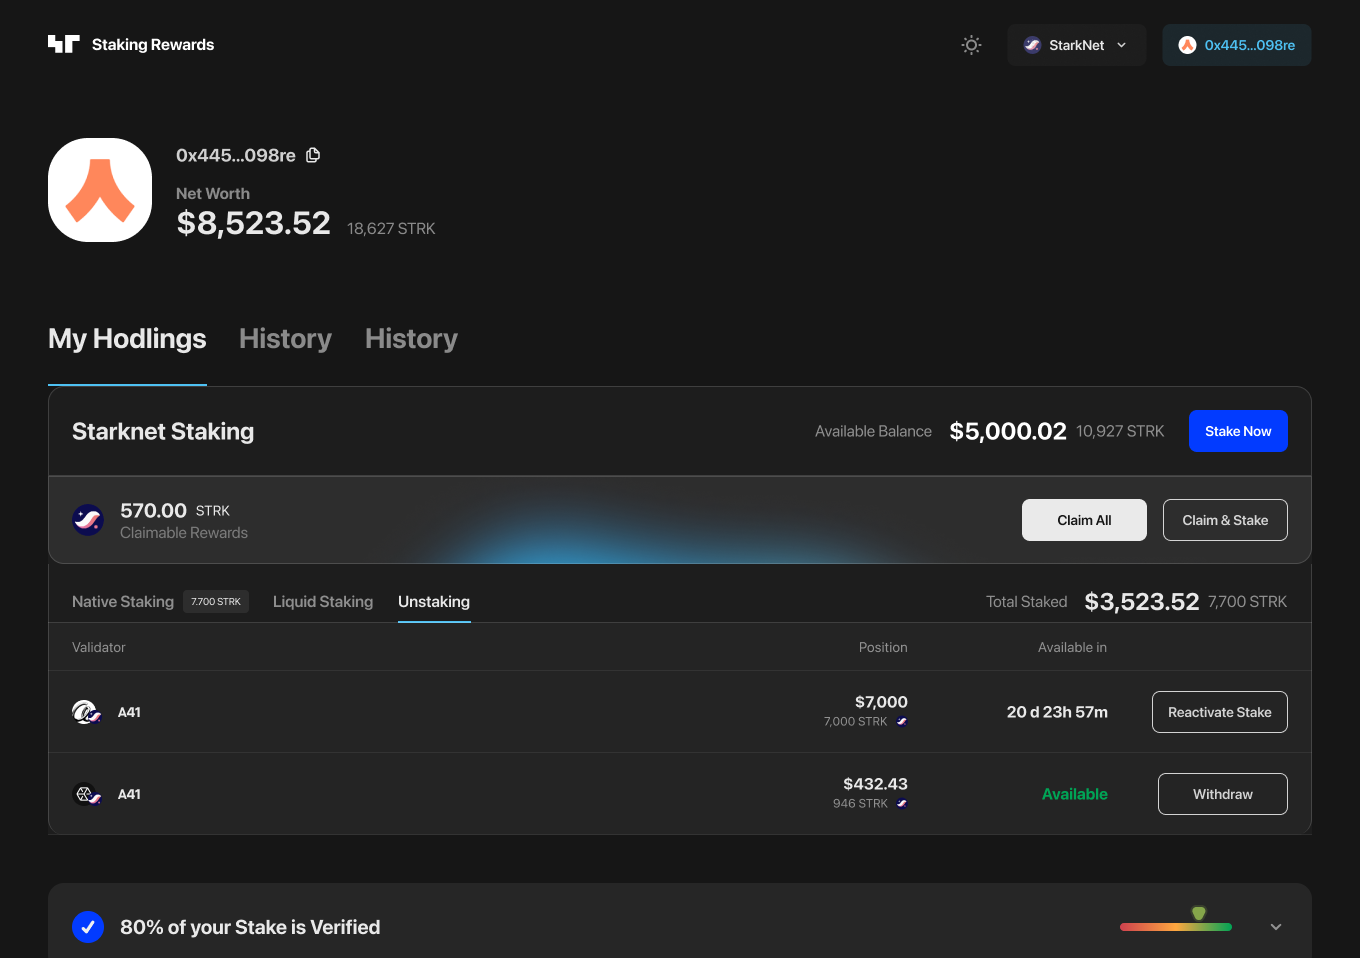
In the Terminal, you can track any unstaked positions in the “Unstaking” tab.
Here you can track the remaining time left to wait before your stake becomes available. Once available you can either withdraw, or stake again.
How to Switch Provider
In the Staking Terminal you can unstake and switch providers in one place. Follow the steps below to get started.
Step 1: Choose a staked position to switch providers
To begin, click the icon with three dots (...) on your staked position, then click “Switch Provider” from the pop out menu.
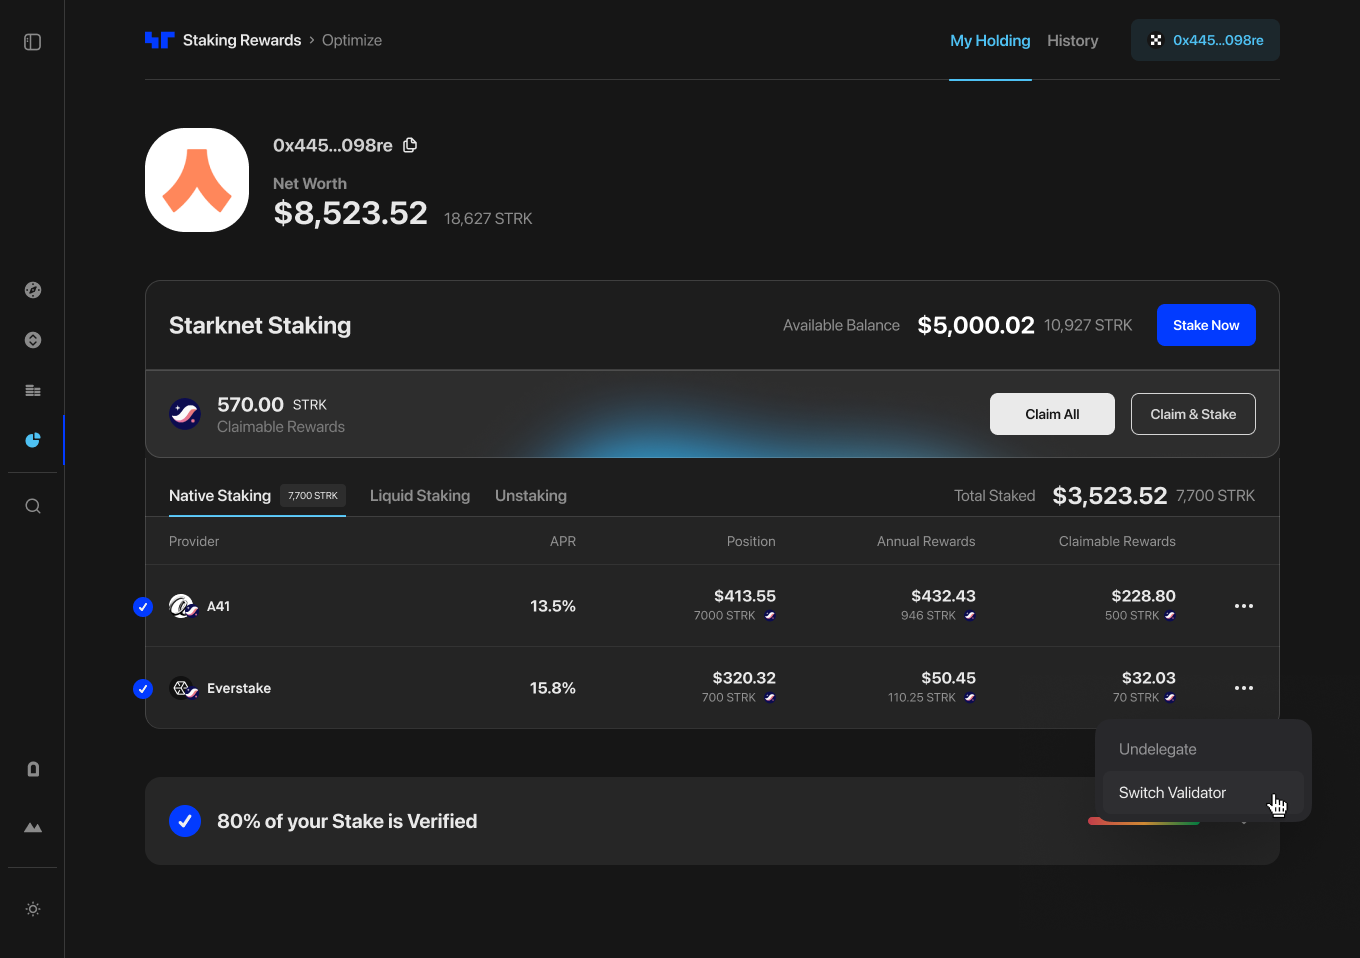
Step 2: Initiate unstake
Click the “Unstake” button and approve the transaction to move forward with the process.
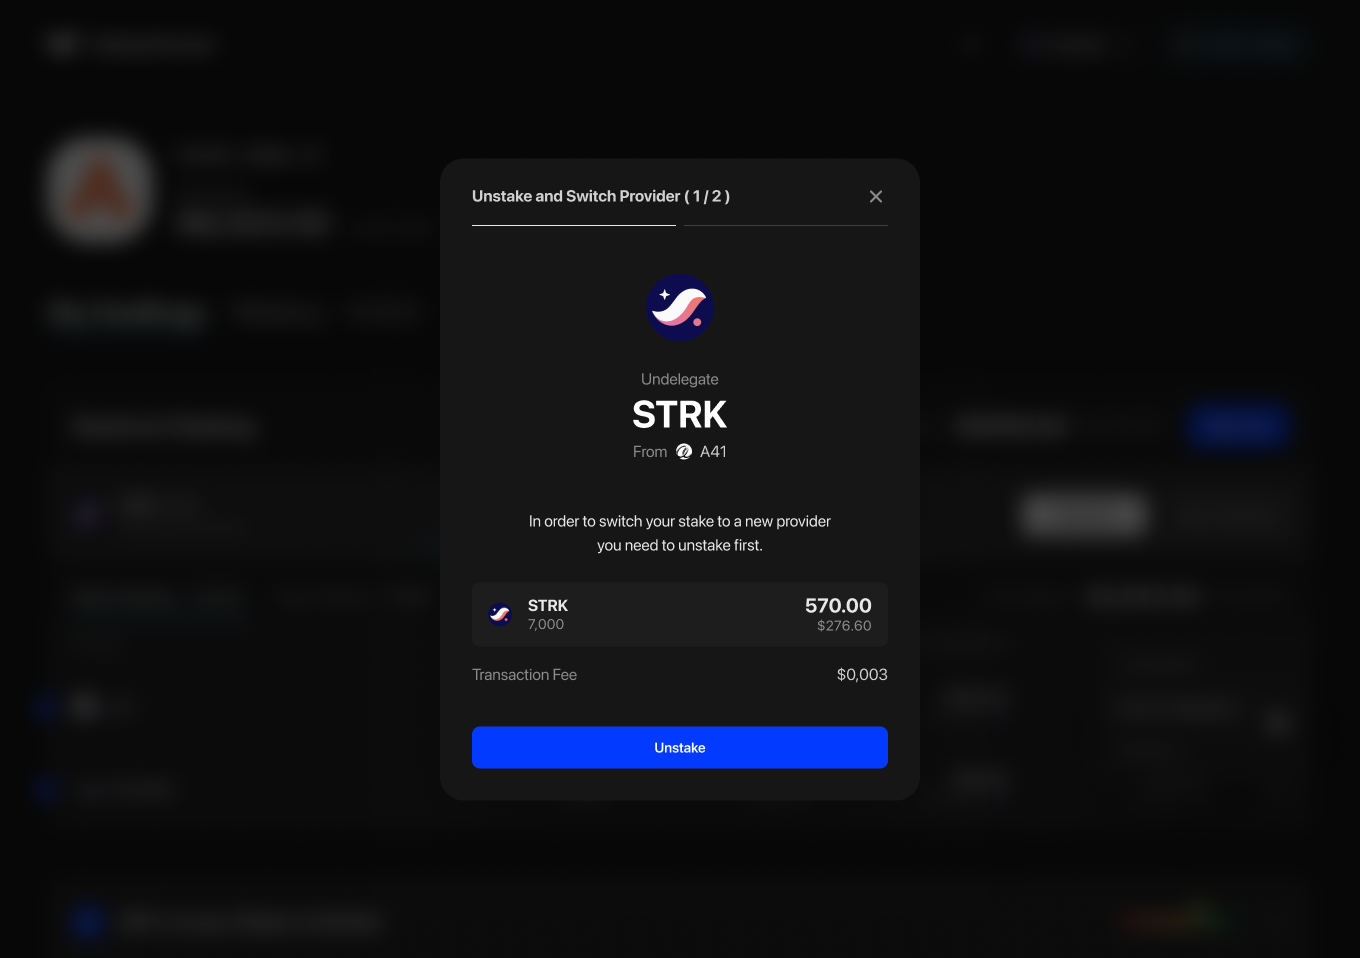
Step 3: Switch stake to a new provider
Click the existing provider selected by default and choose a new provider from the list. Next, click the “Redelegate to the provider” button and confirm the transaction in your wallet.
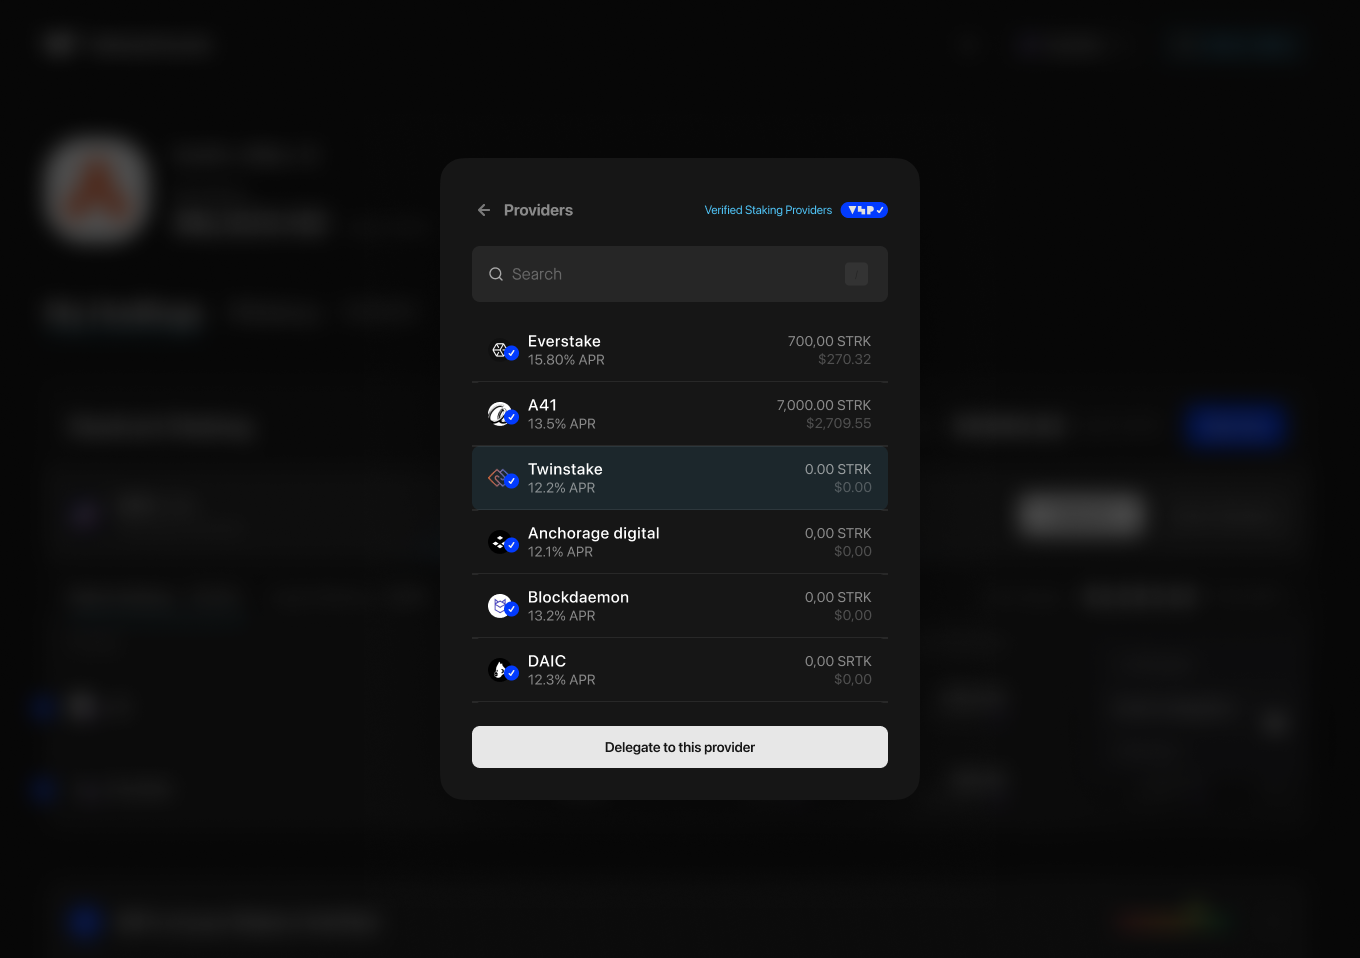
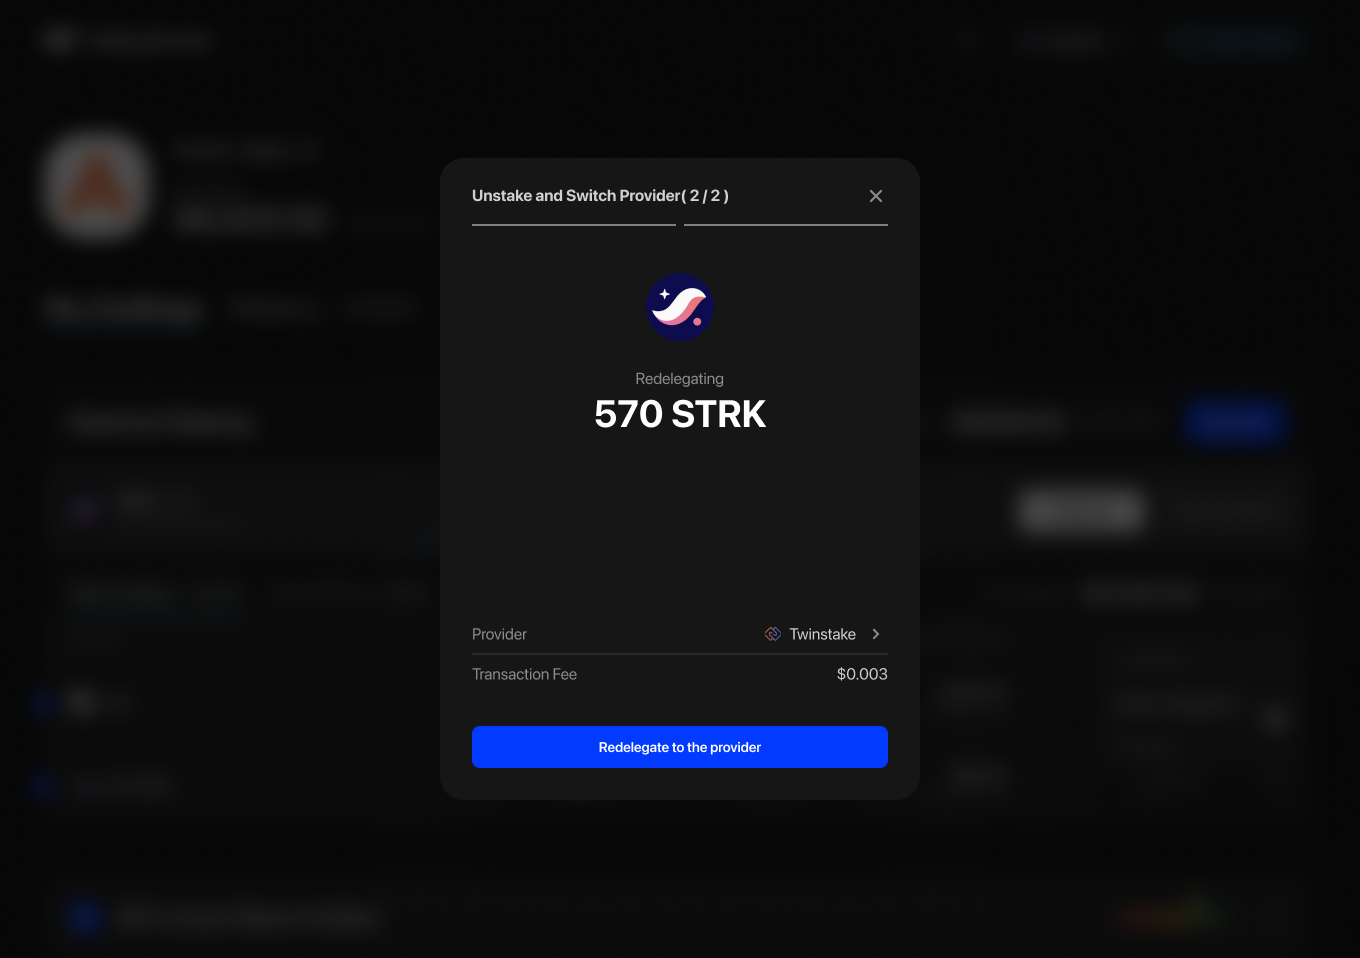
Step 4: Review your new staked position
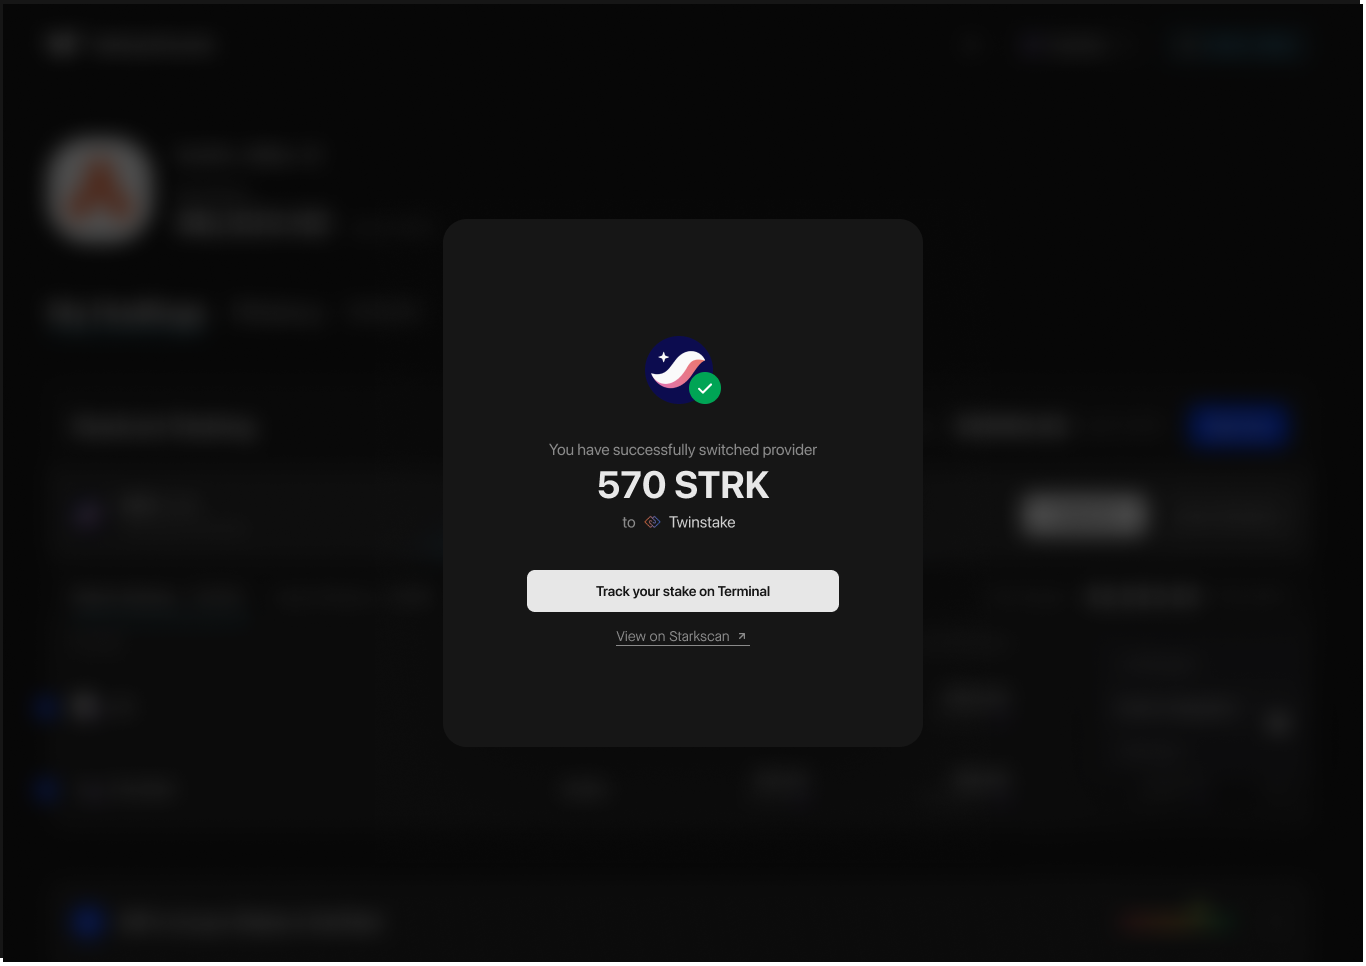
That completes the process. You have successfully switched providers. From here you can track you new staked position in the terminal, or view the transaction on Starkscan.
How to Check your History
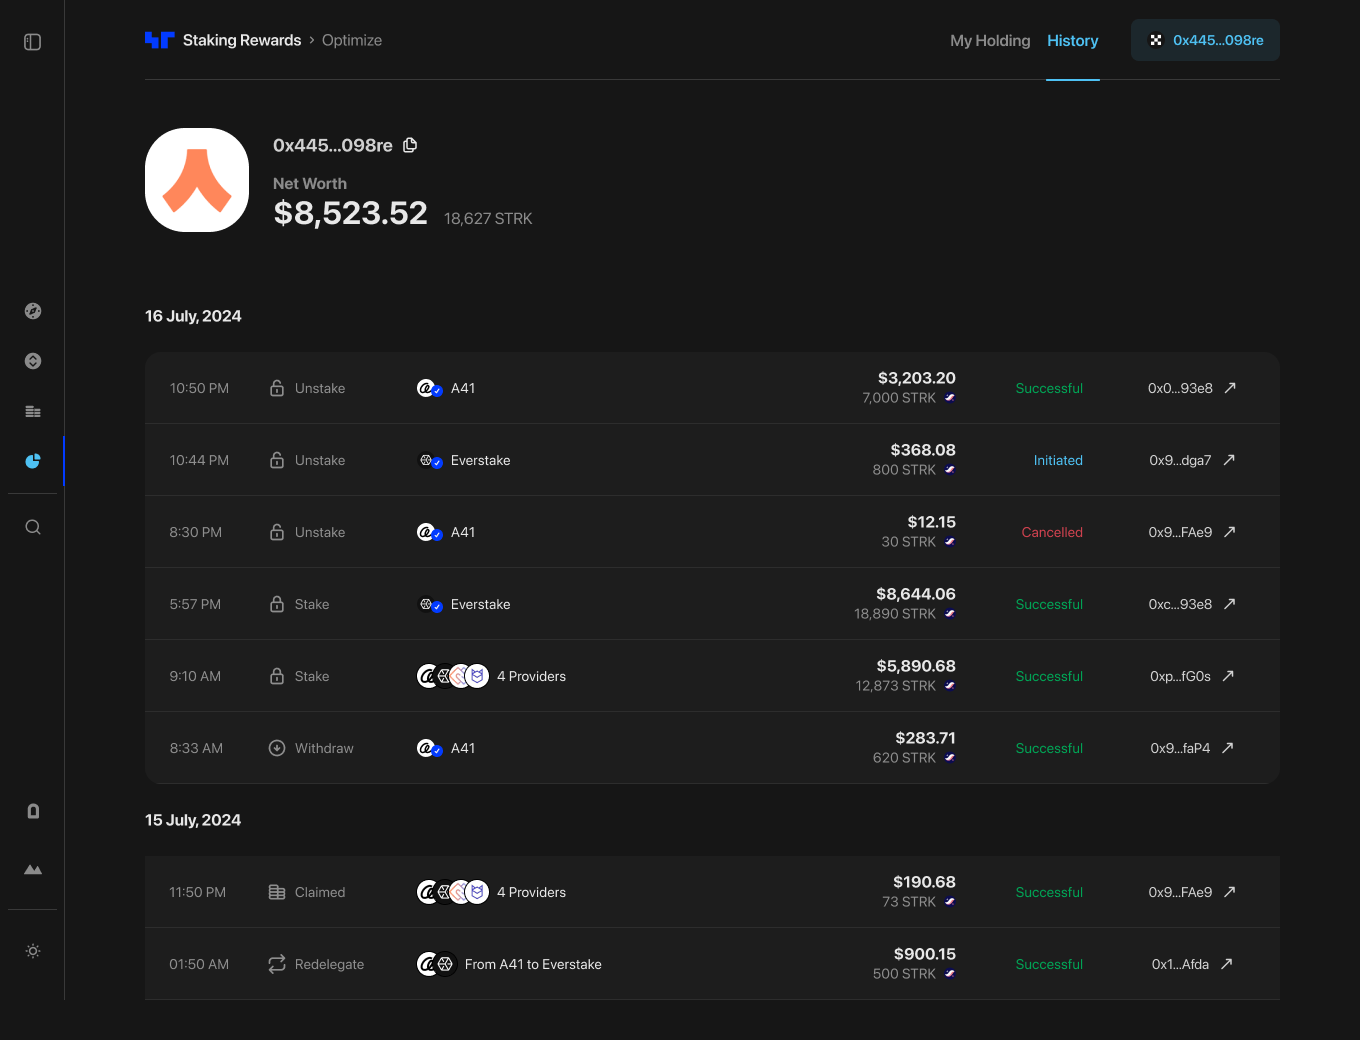
In the Staking Terminal you can review all of your staking history by clicking on the “History” tab in the top navigation bar.
If you have any questions on how to stake your STRK in our UI, head to our Discord and create a support ticket.



Institutional-Grade Research
Delivered to Your Inbox
Join 12,000 institutional allocators worldwide. No spam, unsubscribe anytime.